Replacing Legacy Microsoft Teams Webhooks with Power Automate Workflows
Background
Microsoft announced that legacy Microsoft Teams Incoming Webhooks (Office 365 Connectors) will be retired by the end of 2025.
All integrations that currently post alerts or notifications to Teams must migrate to the new Power Automate model.
This new approach still lets you send simple HTTP POST requests but gives you far more flexibility—you can post plain text, send Adaptive Cards, or even add complex logic inside your flow.
Flow 1 — Simple Text Flow
Step 1 — Create the Flow
- Go to Power Automate portal.
- Select Create → Instant Cloud Flow.
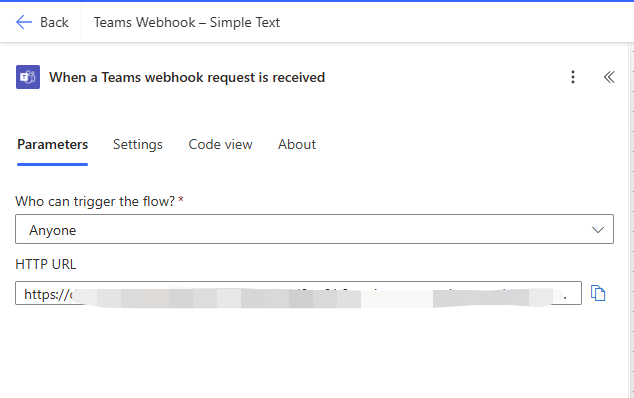
- Choose the trigger “When a Teams webhook request is received.”
Step 2 — Parse the Incoming JSON
Add a Parse JSON action and paste this schema:
{
  "type": "object",
  "properties": {
    "text": { "type": "string" }
  },
  "required": ["text"]
}

Step 3 — Post the Message
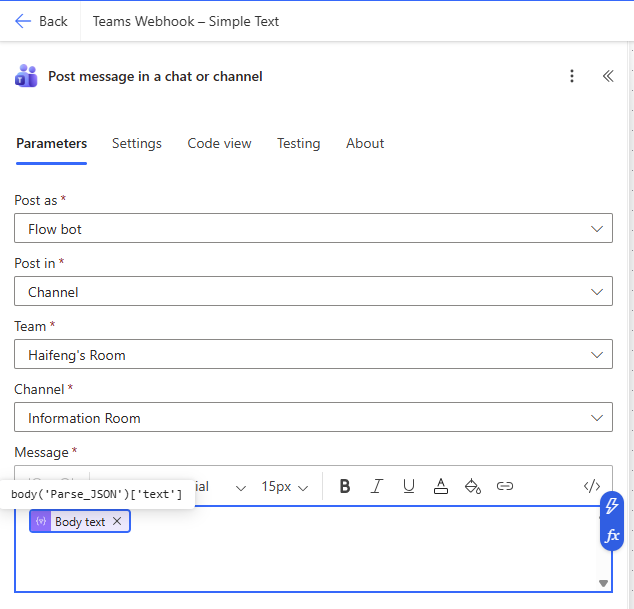
Add “Post message in a chat or channel.”
| Setting | Value |
|---|---|
| Post as | Flow bot |
| Post in | Channel |
| Team | Your Team |
| Channel | Your Channel |
| Message | @{body('Parse_JSON')?['text']} |
(Or simply choose the Body text dynamic field—both work.)
Step 4 — Test the Flow
After saving the flow, the “When a Teams webhook request is received” trigger will automatically generate a unique webhook URL — copy this link; it’s the endpoint you’ll post to from your system or script.
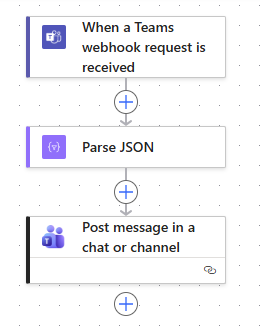
The entire flow will look like this:
Now we can use cURL to test the result (of course, you can also trigger it from Python or JavaScript, depending on your environment):
curl -X POST "<YOUR_FLOW_WEBHOOK_URL>" \
-H "Content-Type: application/json" \
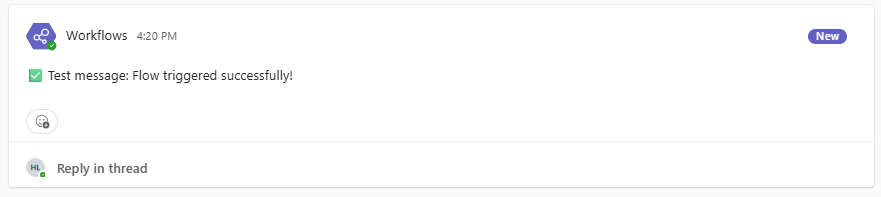
-d '{"text":"✅ Test message: Flow triggered successfully!"}'
The Flow bot will post that text directly to your Teams channel.
Flow 2 — Adaptive Card Flow
Step 1 — Create the Flow
In the Power Automate portal, again create an Instant Cloud Flow with the trigger
“When a Teams webhook request is received.”
Step 2 — Parse the Incoming JSON
{
  "type": "object",
  "properties": {
    "adaptiveCard": { "type": "object" }
  },
  "required": ["adaptiveCard"]
}
Step 3 — Post the Adaptive Card
Add “Post adaptive card in a chat or channel.”
In the card content box, enter:
@{json(string(body('Parse_JSON')?['adaptiveCard']))}
That expression tells Power Automate to take whatever Adaptive Card JSON you send and post it exactly as is.
Step 4 — Test the Flow
curl -X POST "<YOUR_FLOW_WEBHOOK_URL>" \
  -H "Content-Type: application/json" \
  -d '{
    "adaptiveCard": {
      "$schema": "http://adaptivecards.io/schemas/adaptive-card.json",
      "type": "AdaptiveCard",
      "version": "1.4",
      "body": [
        { "type": "TextBlock", "text": "Production Alert", "weight": "Bolder", "size": "Large", "wrap": true },
        { "type": "TextBlock", "text": "CPU usage > 90% for 5 minutes", "wrap": true },
        { "type": "FactSet", "facts": [
          { "title": "Host", "value": "app-01" },
          { "title": "Region", "value": "SGP1" }
        ]}
      ],
      "actions": [
        { "type": "Action.OpenUrl", "title": "View Dashboard", "url": "https://grafana.example.com/d/abc" }
      ]
    }
  }'
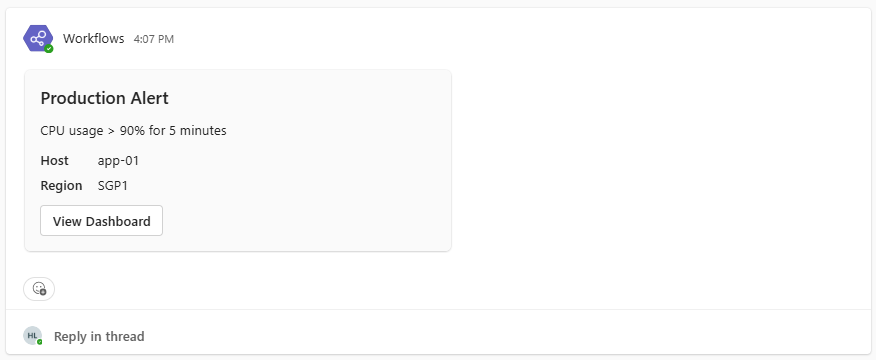
Teams will display the exact card defined in your payload.
Going Further — More Advanced Scenarios
Once you’re comfortable with these two basic flows, you can extend them in many ways:
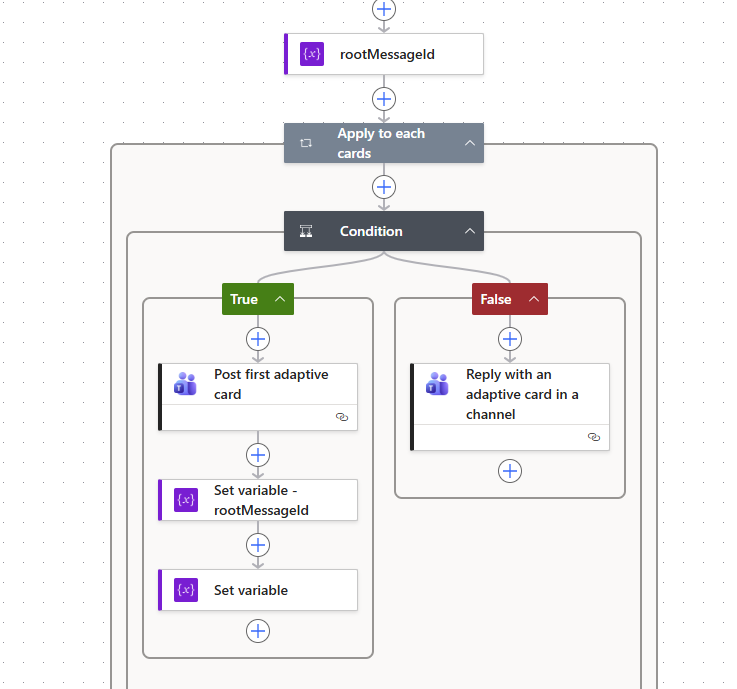
- Send multiple messages at once
→ Add a loop (For Each) inside the Flow and post multiple messages sequentially. - Reply to existing messages
→ Use “Post reply to a message” with themessageIdfrom the incoming payload. - Interactive cards and approvals
→ Use “Post Adaptive Card and wait for a response” to collect feedback.
These more complex designs follow the same principle but go beyond the scope of this introductory article.
1 Response
[…] Richer Teams messages Workflows support Adaptive Cards, buttons, approvals, and formatted payloads—not only static connector cards. lihaifeng.net+1 […]