Symantec Cloud SWG License Binding Procedure
Terminology and Scope
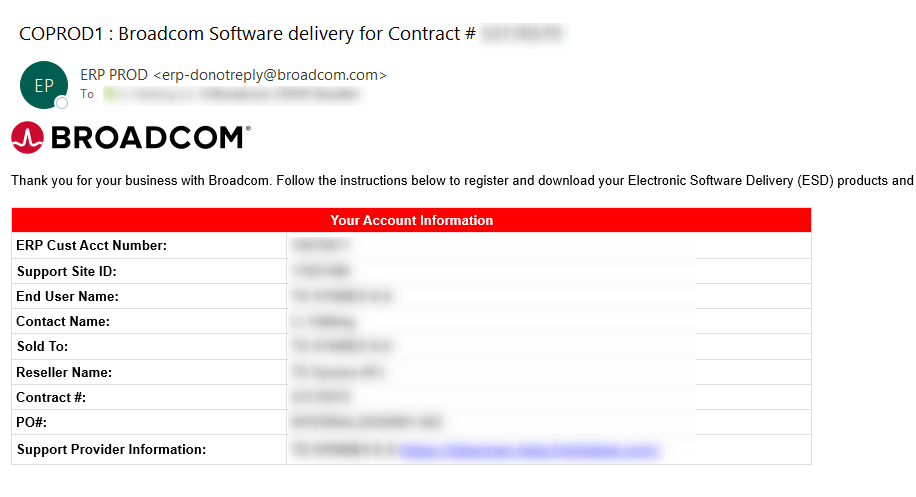
- Site ID / Contract ID
- Source: Purchase confirmation email (ESD)
- Purpose: Used in the Broadcom Support Portal to associate entitlements and view contracts
- Environment
- The operational tenant of Cloud SWG. Every subscription must be assigned to an Environment
- Enterprise Console
- The console to configure bindings, and to view/manage subscription quantities and expiration dates
- Fulfillment Dashboard
- Used to view and manage licenses, especially when subscriptions are placed in Tenant On Hold status
Step 0: Prerequisites
- ESD Email: Record Site ID and Contract ID
- Admin email address
Step 1: Create a Broadcom Support Portal Account
- Open profile.broadcom.com/web/registration
- Fill in details and verify your email
- Once completed, you can access:
- My Entitlements (contracts/licenses)
- Download Center
- Case Management (support cases)
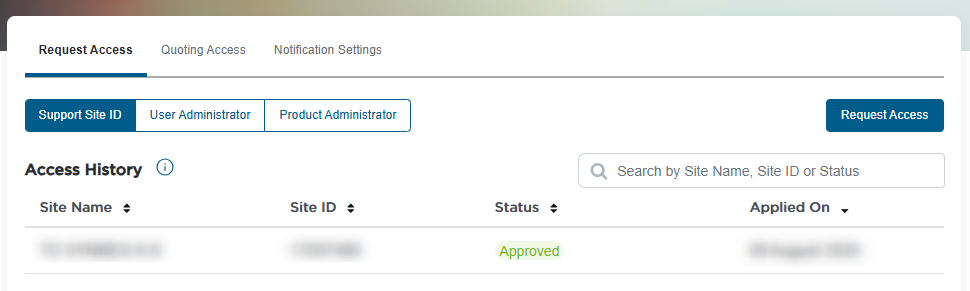
Step 2: Associate Site ID in Support Portal
- Log in to support.broadcom.com
- Click your username → Request Site Access
- Enter the Site ID → click Save
- Wait for approval (up to 24 hours)
- Verify that contracts appear under My Entitlements
Step 3: Register / Activate the Cloud SWG Portal
- (Skip if already registered)
- Open https://portal.threatpulse.com/register
- Fill in:
- Contract ID
- Admin email address
- First / Last name
- Click Register → follow the email instructions to set a password
- Log in to the Cloud SWG Portal: https://portal.threatpulse.com
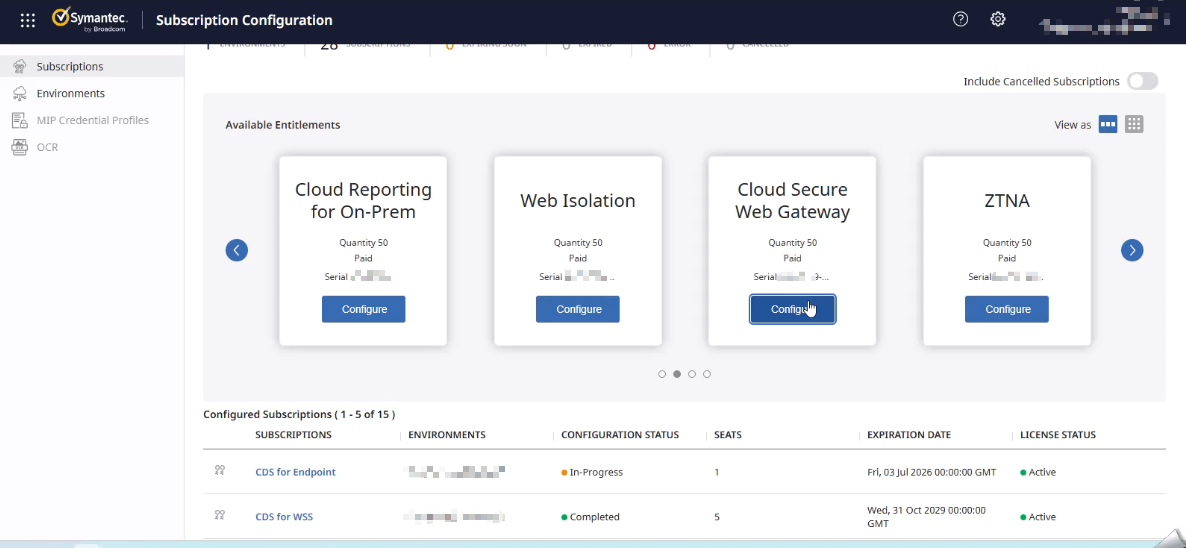
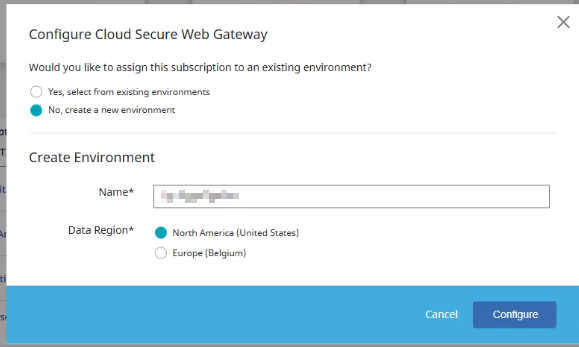
Step 4: Create Environment and Bind Subscription
- Log in to Portal → Enterprise Console / Subscription Config
- Under Available Entitlements, locate Cloud Secure Web Gateway → click Configure / Manage
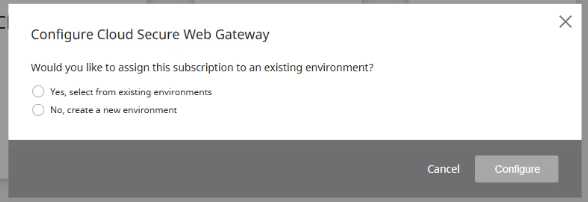
- Choose:
- Assign to an existing environment
- Or create a new environment → select No, create a new environment
- Fill in:
- Environment Name (cannot be changed later)
- Data Region
- Click Configure → wait for backend provisioning
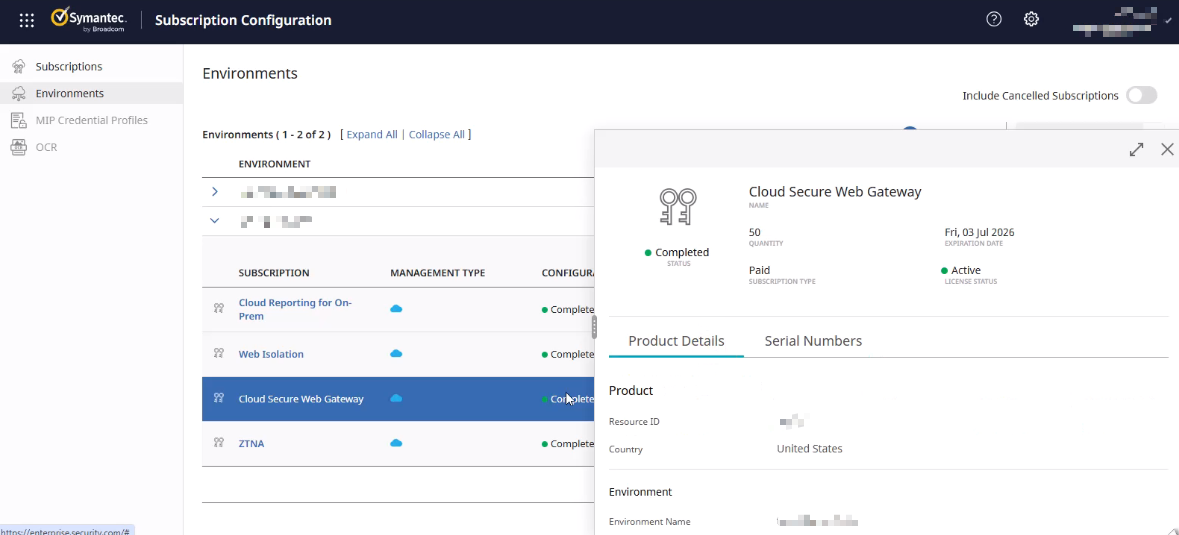
Step 5: Verify Subscription
- Open the Environment → Cloud Secure Web Gateway
- Check:
- Status: Active
- Configuration Status: Completed
- Quantity / Expiration Date: Matches contract
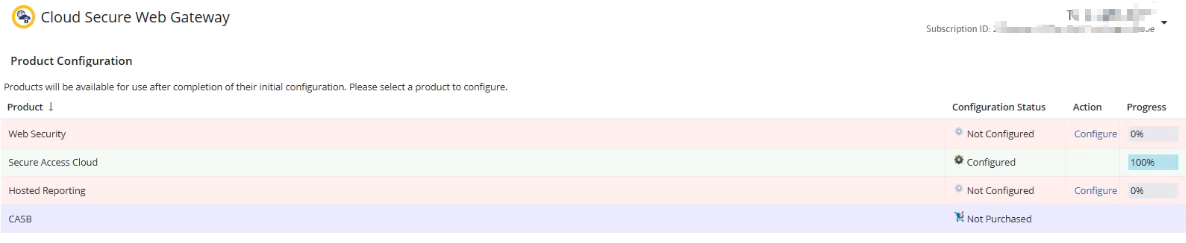
- You may need to configure initial settings on the Cloud SWG Portal. Generally, just select the default settings and continue. These settings can be configured later.
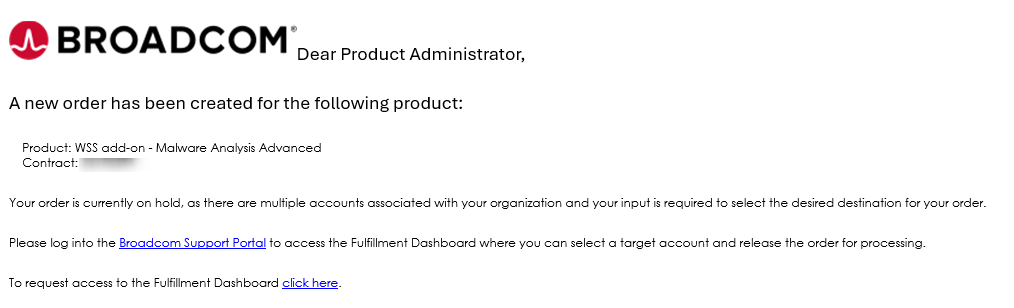
Step 6: Handling On Hold Status
6.1 What is Tenant On Hold
- When the subscription cannot be directly assigned, the order will be On Hold
- Common reasons:
- Tenant not specified
- Add-On purchase requiring assignment to an existing tenant
- Multiple tenants exist and selection is needed
6.2 Roles
- Only the Product Administrator (Ship-To contact on the contract) can resolve On Hold items in the Fulfillment Dashboard
- If you don’t have this role → apply in Support Portal → Request Site Access → Product Administrator
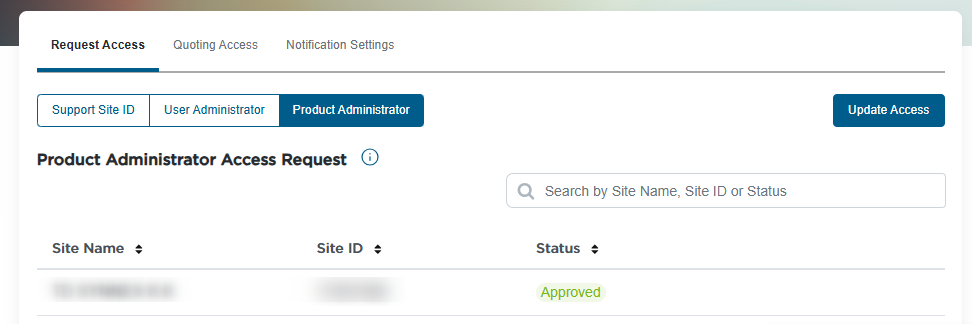
- Reference: KB206833
6.3 Fulfillment Dashboard Process
- Log in to support.broadcom.com
- Open My Entitlements – Fulfillment Dashboard (visible only to Product Administrators)
- Click Select Tenant
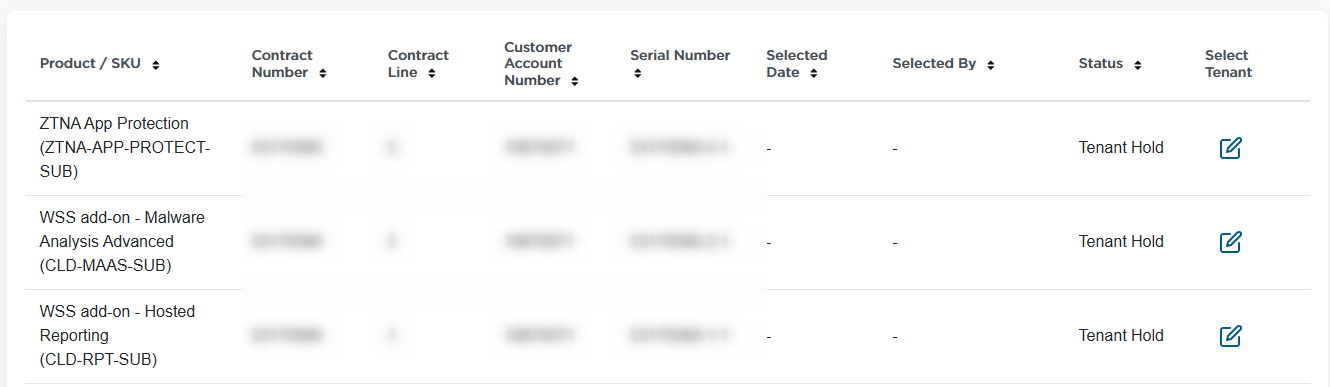
- Choose action:
- Option A: Create New Tenant (Standalone products only)
- Option B: Move to Existing Tenant (Add-On products must be assigned to an existing tenant)
Notes:
- If the order contains Standalone + Add-On products:
- Release the Standalone first → wait ~2 hours for tenant provisioning
- Return to Fulfillment Dashboard and release the Add-On into that tenant
- Reference: KB366761 – SaaS Tenant Hold and Release Process
Step 7: Add-On License Activation
- Confirm the Add-On type (e.g., Malware Analysis Advanced, Hosted Reporting, CASB features, etc.)
- In the Fulfillment Dashboard, locate the On Hold Add-On entry
- Select Move to Existing Tenant, and choose the target Cloud SWG Environment
- Submit → Add-On will be activated on the tenant
- Wait for backend synchronization (typically 1–2 hours)
- Go back to Enterprise Console, binding Environment(same as Cloud SWG)
- Log in to Cloud SWG Portal → Products & Licensing → verify:
- The new feature is available

Step 8: Connectivity and Validation
- Configure an access method in the Portal (e.g., WSS Agent, IPsec, Explicit Proxy)
- Connect with a test user
- Verify traffic and reporting under Reports
- For Add-On licenses, confirm that new features are enabled and functional
Verification Checklist
- Environment created and status is Active
- Environment shows correct Quantity / Expiration / Status
- Add-On License successfully assigned to the tenant, features updated
- Traffic test and Add-On feature validation completed
Recent Comments