This guide describes how to integrate Azure Entra ID with Symantec Zero Trust Network Access (ZTNA) using both SAML (for authentication) and SCIM (for user and group provisioning).
Goals
Authenticate users to ZTNA through Azure Entra ID
Synchronize users and groups automatically using SCIM
Enforce Azure Conditional Access and MFA
Map Azure groups to ZTNA policies
SAML = AuthenticationSCIM = User / Group Provisioning
2. Configuration Steps
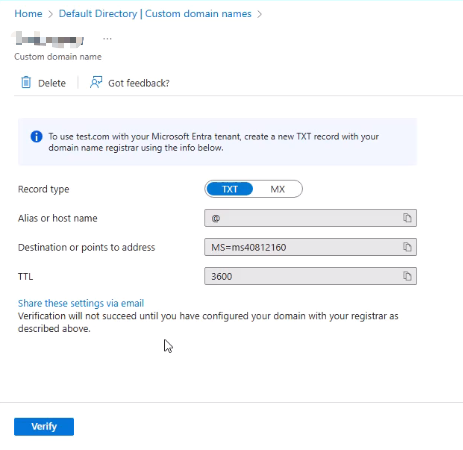
Step 1 – Verify a Custom Domain
If you want users to log in with user@yourdomain.com, you must verify your domain in Entra ID:
Go to Azure Portal → Entra ID → Custom domain names
Select + Add custom domain
Enter your domain, e.g., lihaifeng.net
Copy the TXT record(or MX) provided by Microsoft and add it to your DNS provider
Once DNS propagation is complete, return to the portal and select Verify
After verification, the domain will be available for user UPNs
Without domain verification, Entra ID accounts can only use the onmicrosoft.com suffix.
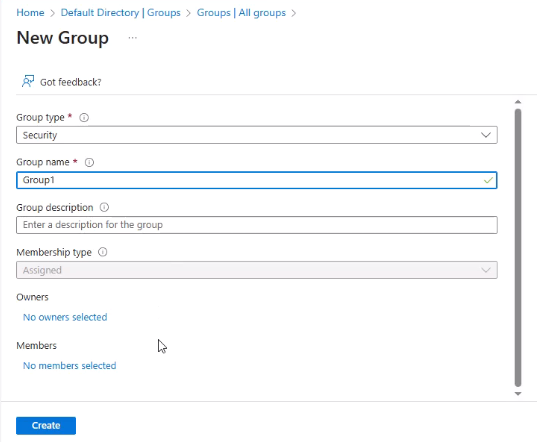
Step 2 – User and Group Assignment
In Entra ID → Groups, create a new group
Ensure the Group type is set to Security
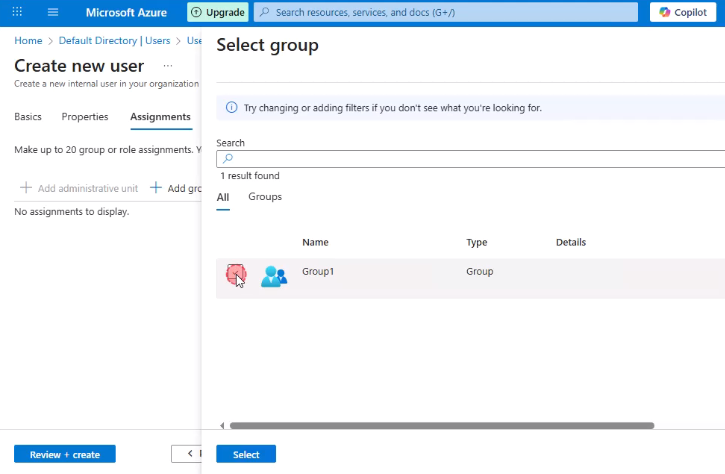
Go to the Users tab → create a new user
Choose the verified domain as the UPN suffix
Assign the user to the group created earlier
In the application Symantec Web Security Service (WSS) → Users and groups
Select + Add user/group
Add the created user
Alternatively, assign the security group so that all members gain access (requires a higher plan level)
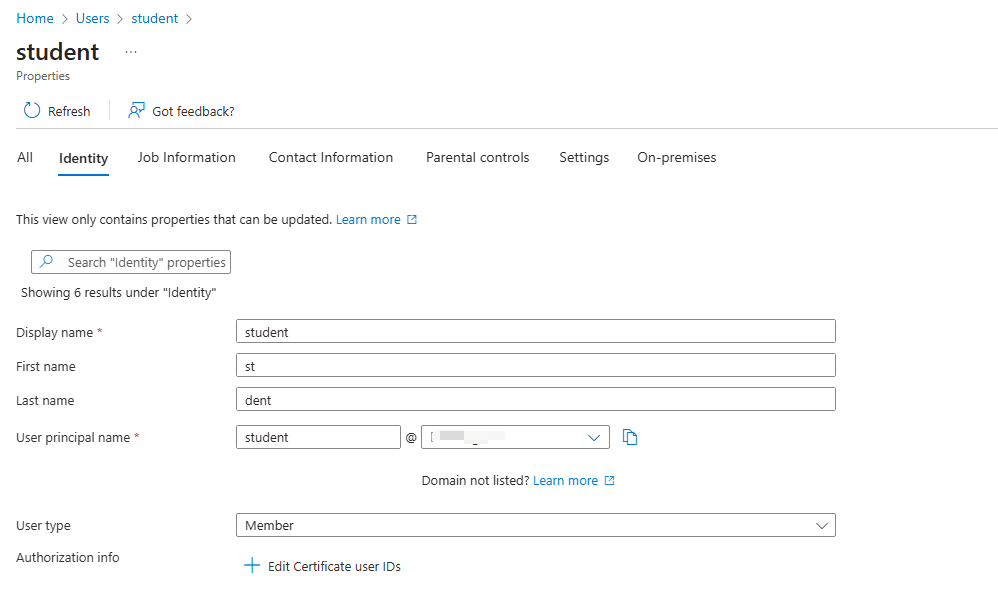
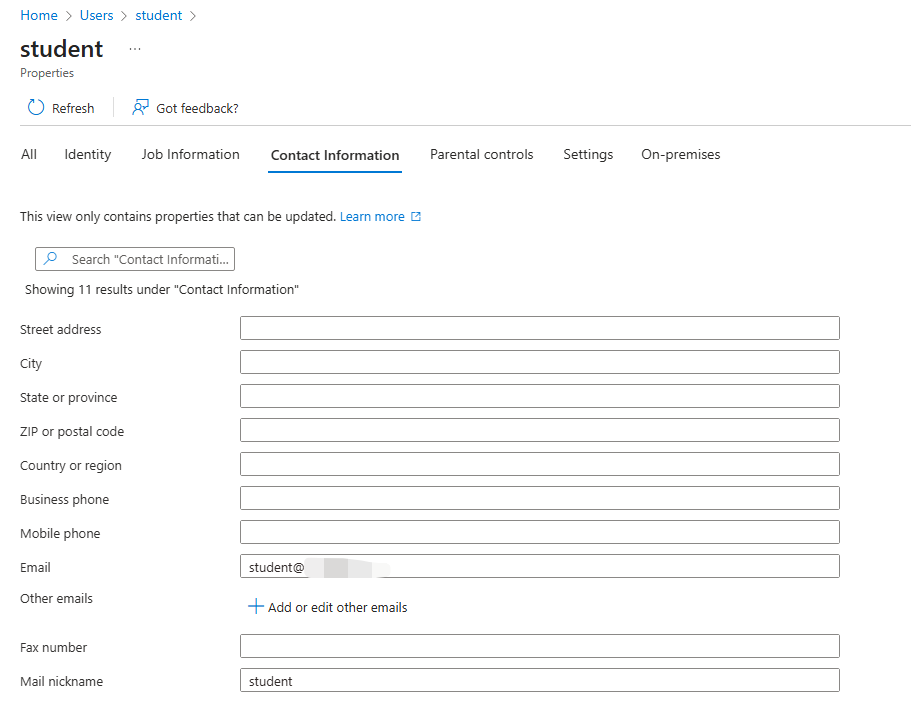
Step 3 – Verify Azure User Information
Before enabling SCIM provisioning, confirm that each Azure user has:
Tab
Required Fields
Identity
Display name, First name, Last name, User Principal Name (UPN)
Contact Information
Email address
Missing attributes (especially email) will prevent SCIM synchronization.
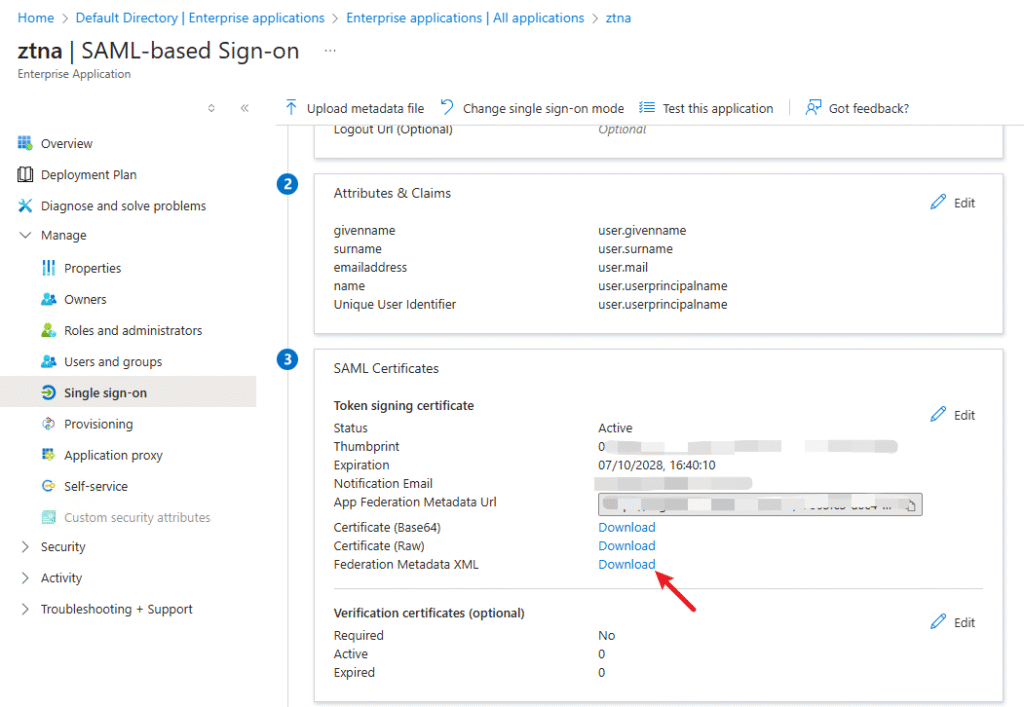
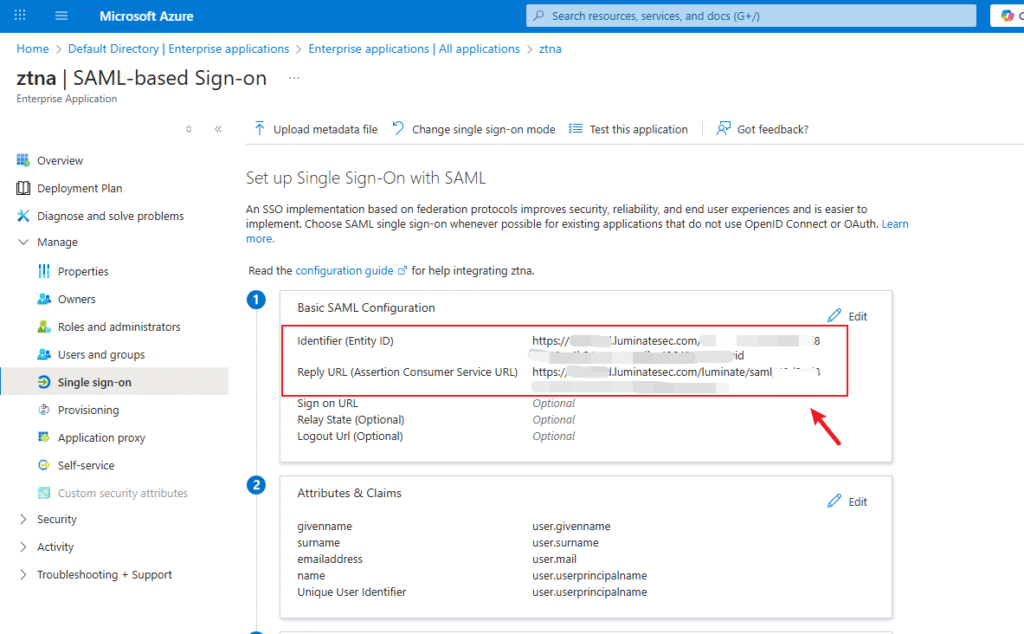
Step 2 – Create a Generic SAML Application in Azure
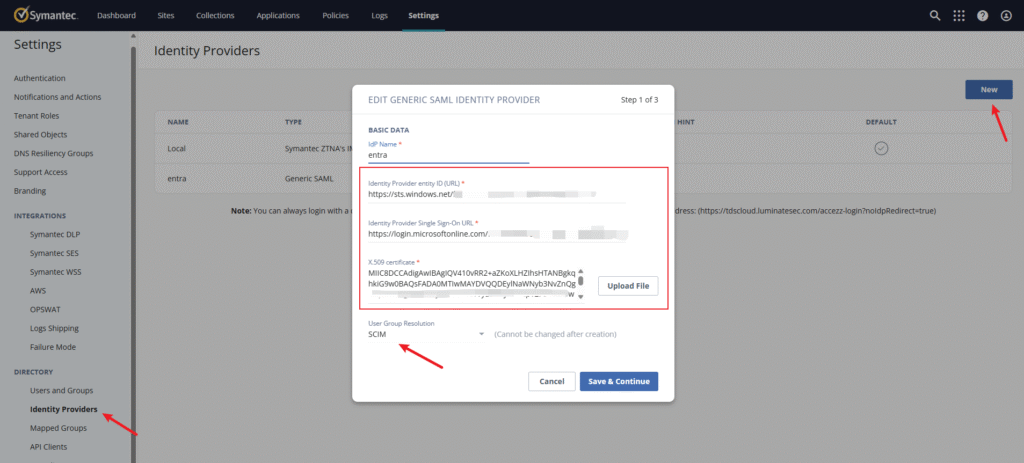
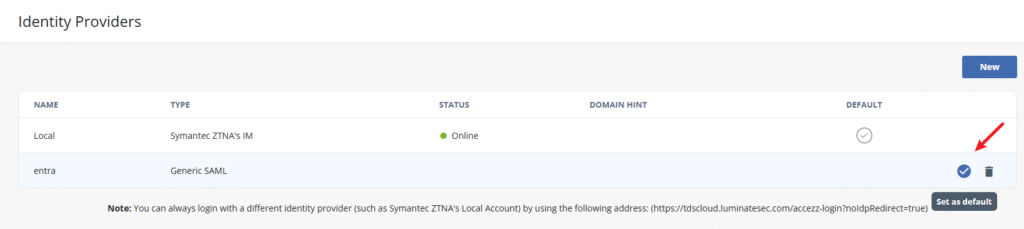
Step 8 – Set Azure Entra ID as the Default Identity Provider in ZTNA
In the ZTNA Admin Portal, go to Settings → Identity Providers.
Click Set as Default button.
Once saved, ZTNA will use Azure Entra ID as the default authentication source for user logins and policy assignments.
Note: You can always login with a different identity provider (such as Symantec ZTNA’s Local Account) by using the following address: (https://tenantname.luminatesec.com/accezz-login?noIdpRedirect=true)
Step 9 – Verify User Access
1. Assign a User in Azure
Azure → Enterprise Applications → your ZTNA app → Users and Groups → Add user/group
Select a test user and click Assign.
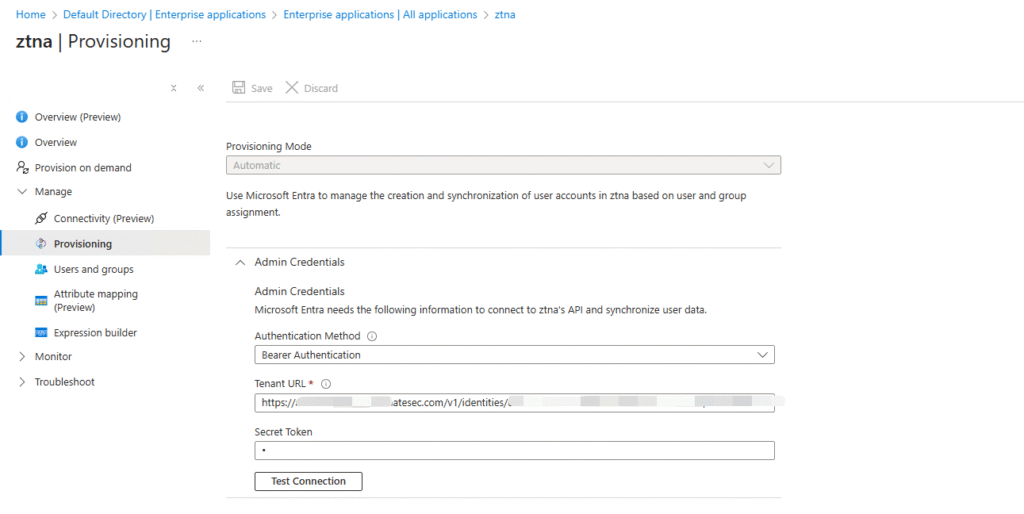
2. Provision the User
Go to Provisioning → Provision on demand.
Select the test user → click Provision.
If you see Modified attributes (successful), the provisioning succeeded.
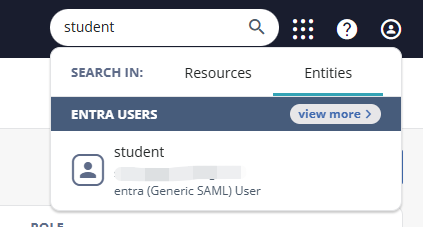
3. Verify in ZTNA
Search for the user email (using the ZTNA Domain Alias).
The user should appear.
4. Test Login
Open your ZTNA Portal, e.g. https://tenant-name.luminatesite.com
Sign in with the Azure user you just provisioned.
Successful access confirms the integration is working.


Recent Comments