Installing and Configuring Tailscale on Synology NAS
Access Synology and Local Network Devices via Tailscale from Windows or Mobile (with Subnet Routes)
Objective
This guide walks you through:
- Installing Tailscale on Synology DSM
- Setting up your Synology as a Subnet Router
- Allowing external devices (Windows / Mobile) to access Synology and the entire LAN using their original IPs
Even when your laptop or phone is on an external network (4G/5G/Wi-Fi elsewhere),
you’ll be able to access your Synology DSM and LAN devices using their native IPs, e.g.:
https://172.16.20.102:5001
Step 1. Download the .spk Package
- Visit the official page:
👉 https://pkgs.tailscale.com/stable/#spks - Go to Synology’s official page:
👉 https://kb.synology.com/en-uk/DSM/tutorial/What_kind_of_CPU_does_my_NAS_have
Find your NAS model in the list and note the CPU model (for example, “Intel Celeron J4125” or “Realtek RTD1296”). - Search the CPU model on Google, for example:
Celeron J4125 architecture
This tells you if it’s x86_64, aarch64 (ARM64), or armv5/7/8. - Download the appropriate file to your computer.
Step 2. Install via DSM GUI
- Log in to DSM → open Package Center
- Click Manual Install in the upper-right corner
- Select the
.spkfile you just downloaded - Proceed through the wizard → Accept → Install
- After installation, check Installed Packages → Tailscale
Step 3. Connect Synology to Tailscale
- Open Tailscale from DSM Main Menu
- Click “Log in to Tailscale”
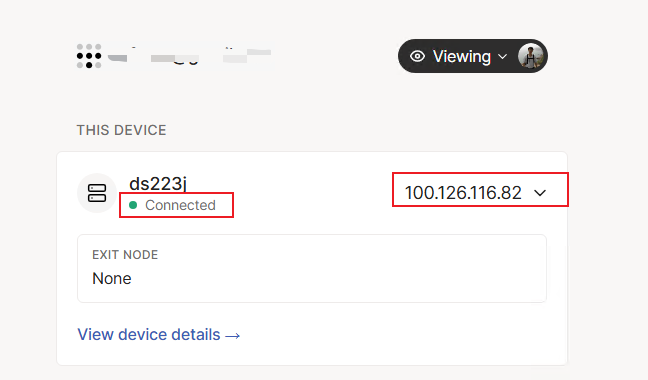
- Once authenticated, the DSM window will show: “Connected”
At the Tailscale window you’ll see something like:
100.65.23.25
This is your Synology’s Tailscale address — you’ll use it for testing later.
Step 4. Join the Same Tailnet from Windows
- Install Tailscale for Windows
- Sign in using the same account as on Synology
Step 5. Configure Subnet Routes
- On your Windows computer where Tailscale is installed, open a browser and visit your Synology’s Tailscale IP address:5001.
This lets you access DSM through the Tailscale network, even if you’re not on the same LAN. - DSM → Tailscale → Settings
- If you see “Viewing” at the top right, click it → Sign in.
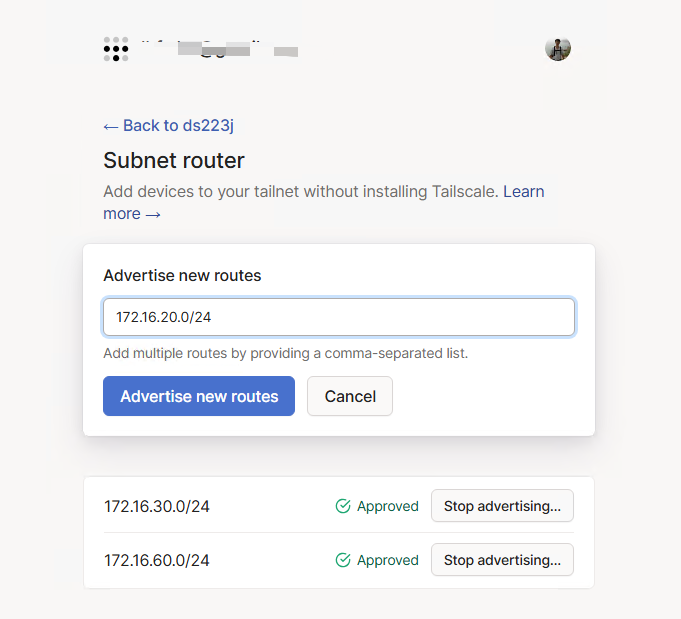
- Check the option:
Subnet router - Enter your LAN subnet (adjust to your actual network):
172.16.20.0/24
Step 6. Approve Subnet Routes in Tailscale Admin Console
- On your Windows browser, open:
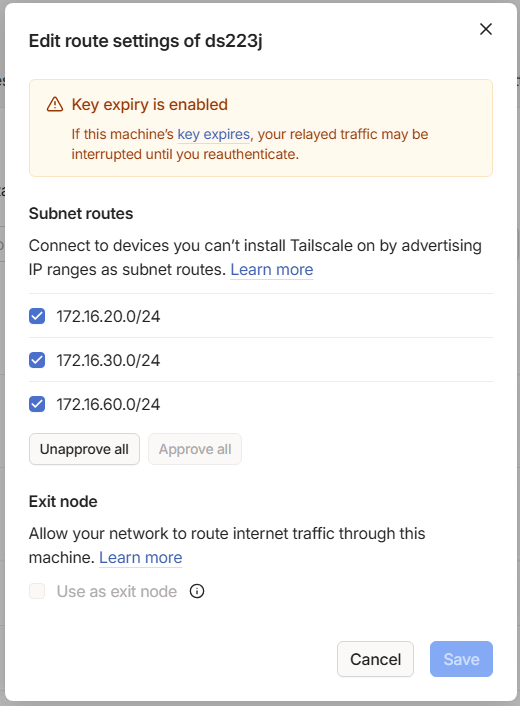
👉 https://login.tailscale.com/admin/machines - Locate your Synology device (e.g.,
ds223j) → Edit route settings - You’ll see something like:
Subnet routes: 172.16.20.0/24 - Check it and Save
Step 7. Test Access from Windows or Mobile
- On your phone, install Tailscale from the App Store (iOS) or Google Play (Android).
- Open the app and sign in with the same account you used on Synology (e.g., Google or Microsoft).
- Once signed in, your Synology NAS should appear in the Devices list and show Connected.
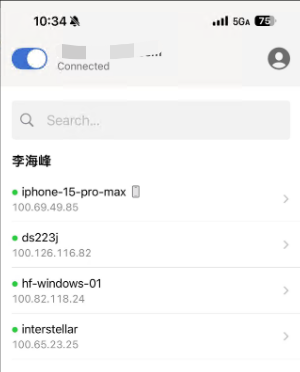
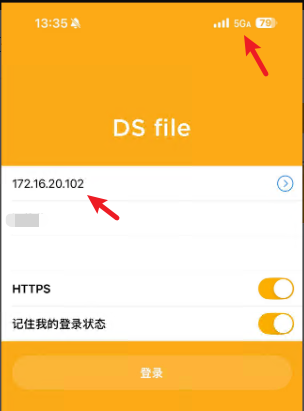
- Now, you can directly open Synology’s original LAN IP (for example
https://172.16.20.102:5001) from the phone — Tailscale will automatically route it through your NAS. - You can also use Synology’s official mobile apps (such as DS File, DS Photo, DS Audio, etc.) and connect by entering the same LAN IP instead of QuickConnect or DDNS — they’ll work seamlessly through Tailscale.
Recent Comments