Symantec ZTNA Application Configuration Guide
Objective: Configure Symantec ZTNA to allow secure browser or native-client access (Web, RDP, SSH) to internal enterprise resources—without VPN.
Related Articles
This article is part of the Symantec ZTNA Integration Series, which covers step-by-step configurations across multiple components:
- Integrating Cloud SWG (WSS) and SES with ZTNA
👉 https://lihaifeng.net/integrating-cloud-swg-wss-and-ses-with-ztna/ - Integrating Symantec Cloud SWG with SEP/SES
👉 https://lihaifeng.net/integrating-symantec-cloud-swg-with-sep-ses/ - Symantec ZTNA Application Configuration Guide
👉 https://lihaifeng.net/symantec-ztna-configuration-guide/ - Integrating Azure Entra ID with Symantec ZTNA (SAML + SCIM)
👉 https://lihaifeng.net/integrating-azure-entra-id-with-symantec-ztna-using-saml-scim/ - Integrating Symantec Cloud SWG with Azure Entra ID (SAML SSO)
👉 https://lihaifeng.net/integrating-symantec-cloud-swg-with-azure-entra-id-saml-sso/ - Symantec ZTNA Segment Application Integration Guide (with SES + Cloud SWG + Azure Entra ID)
👉 https://lihaifeng.net/symantec-ztna-segment-application-integration-guidewith-ses-cloud-swg-azure-entra-id/
Configure a Site
Purpose:
A Site represents a private network boundary that contains internal applications to be accessed through ZTNA. Every Connector must belong to a Site.
Steps:
- Log in to the ZTNA Console.
- Navigate to ZTNA → Sites → Add Site.
- Enter the following:
- Name:
HF_Home - Region: Choose the region closest to your physical location.
- Name:
- Click Save.
Deploy a Connector
Purpose:
The Connector acts as the secure tunnel between the ZTNA Cloud and the internal network.
ZTNA supports Linux, Windows, and Docker deployment. The example below uses Docker.
Steps:
- Open the previously created HF_Home, then click Add Connector.
- Choose Deployment Type: Linux or Docker Compose .
- Copy the registration command displayed in the console.
- Once registration completes, the Connector status should show Online.
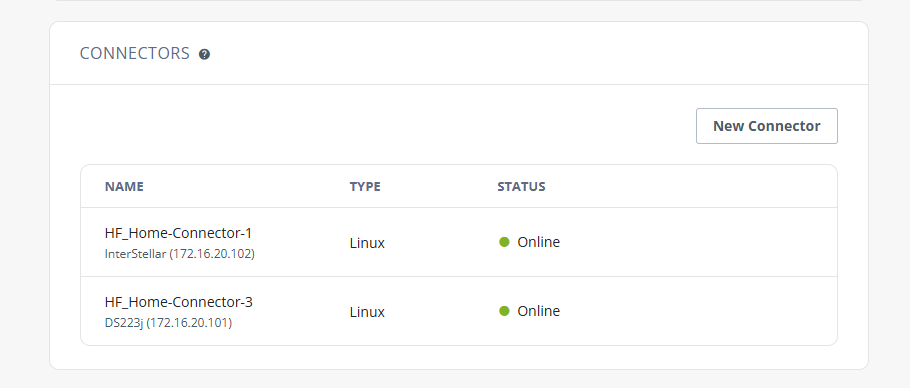
Ensure the host allows outbound TCP/443 access to ZTNA Cloud.
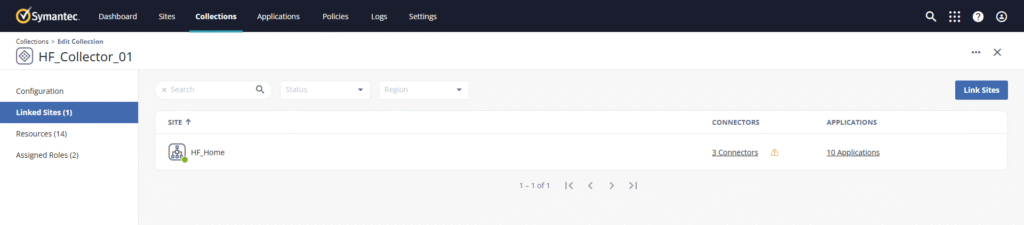
Configure a Collection
Purpose:
A Collection groups multiple Sites logically, enabling load balancing and redundancy across multiple Connectors.
Steps:
- Go to ZTNA → Collections → Add Collection.
- Enter:
- Name:
HF_Collection_01 - Sites: Select
HF_Home
- Name:
- Click Save.
Create Access Policies
ZTNA access policies define who can access what type of application.
When creating a policy, you must select its Policy Type:
- Web
- RDP
- SSH
- Segment
- SSH Gateway
- TCP Tunnel
Example – Web Policy
- Navigate to ZTNA → Policies → Access Control → New – Web Access Policy.
- Configure:
- Name:
HF_Web_Policy - Assigned Entities: Select User or Group
- Assigned Applications: Select the application to which this policy applies. Creating an application will be discussed in the next section.
- Name:
- Save.
Add Applications
ZTNA supports several application types.
Each application must be assigned to a Collection and linked to its corresponding Policy Type.
Steps:
- Go to ZTNA → Applications → New – Web Application(in this example).
- Configure:
- Name:
HF-ESXI-01 - Connection Type: Symantec ZTNA Domain
- Internal Address:
172.16.30.1 - Port:
- - Policy:
HF_Web_Policy
- Name:
- Save.
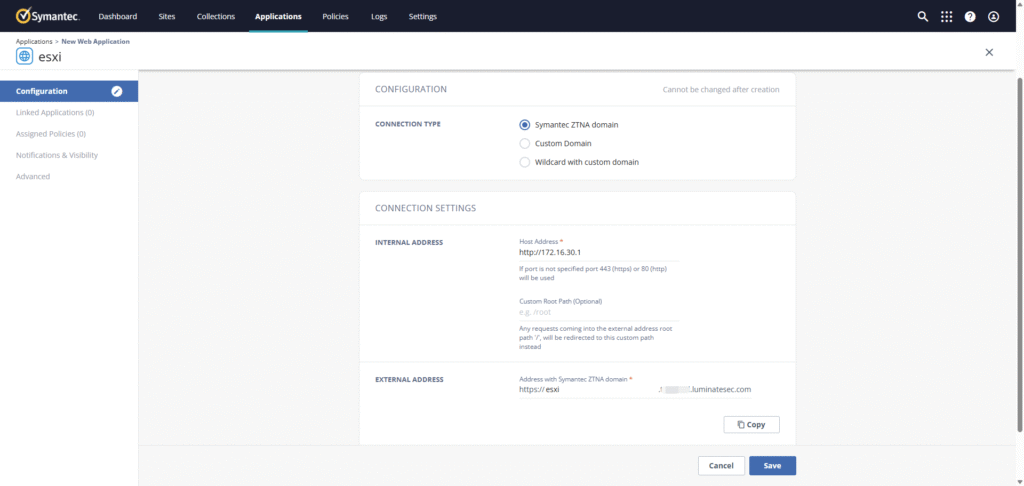
Access Method:
Users can directly open the automatically generated external URL in a browser, e.g.
https://esxi.<tenant>.luminatesec.com
ZTNA establishes an encrypted tunnel and proxies the session to the internal web server.
Verify Access
- Ensure all Connectors show Online in the site.
- From a browser, access each application’s external URL.
- Validate successful connection.
- The Web application is shown here as an example. Other application types (RDP, SSH, etc.) follow a similar configuration process with minor variations in connection method.
If you prefer to use SAML-based authentication instead of local users, refer to my other article:
Integrating Azure Entra ID with Symantec ZTNA Using SAML + SCIM
Recent Comments