Integrating Okta with Symantec Cloud SWG — A Complete Guide from AD to the Cloud
Introduction
In modern enterprise security, Single Sign-On (SSO) and directory-based access control are foundational components. Okta provides seamless integration with on-premises Active Directory (AD) and can act as a SAML Identity Provider (IdP) for Symantec Cloud SWG (formerly WSS).
This guide walks through the complete process of integrating AD → Okta → Cloud SWG, including:
- Registering an Okta Developer account
- Installing and configuring the Okta AD Agent
- Importing and activating AD users
- Adding the Symantec Web Security Service app in Okta
- Enabling SCIM for automatic user/group synchronization
- Configuring Cloud SWG with Okta as IdP
- Testing authentication and troubleshooting common issues
1. Register an Okta Developer Account
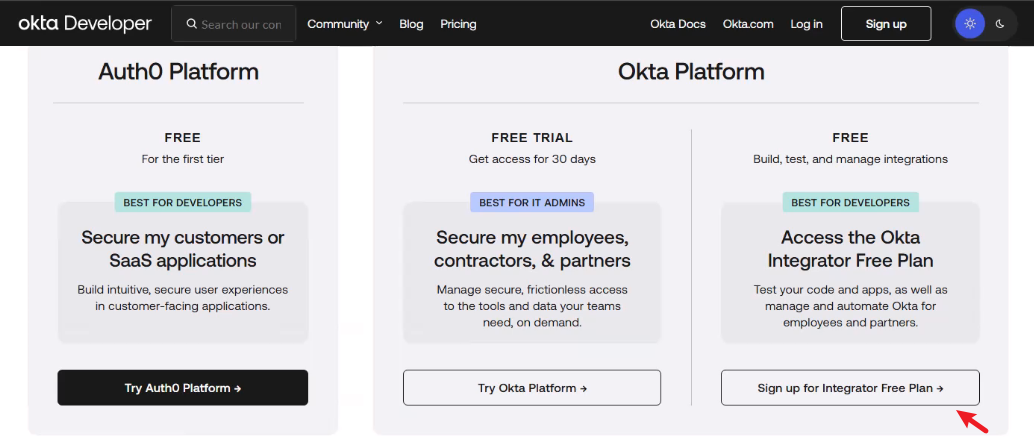
- Go to Okta Developer Signup.
- Complete the registration and receive your own Okta tenant, e.g.:
https://integration-******.okta.com - Log in to the Okta Admin Console — this will be your central management portal.
You can register for an Okta Developer account (note: this is not the Auth0 platform).During registration, you must use a corporate domain or private domain email address — public email providers (e.g., Gmail, Yahoo, Outlook.com) are not accepted.
2. Prepare Active Directory
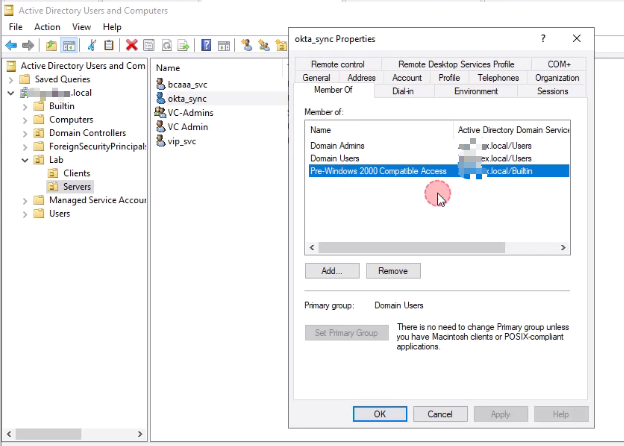
Create a Service Account
- Create a dedicated account in AD, e.g.,
okta_sync.Assign minimal required permissions:- Read user and group attributes (
firstName,lastName,UPN,mail).Add the account to the Pre-Windows 2000 Compatible Access group.
- Read user and group attributes (
User Attributes
Okta requires the following attributes for import:
- givenName (First Name)
- sn (Last Name)
- userPrincipalName (UPN) or mail
If
lastNameis missing, the user will not be imported.
3. Install Okta AD Agent
- In Okta Admin Console: Directory → Directory Integrations → Add Directory → Active Directory.
- Download the Okta Active Directory Agent (MSI).
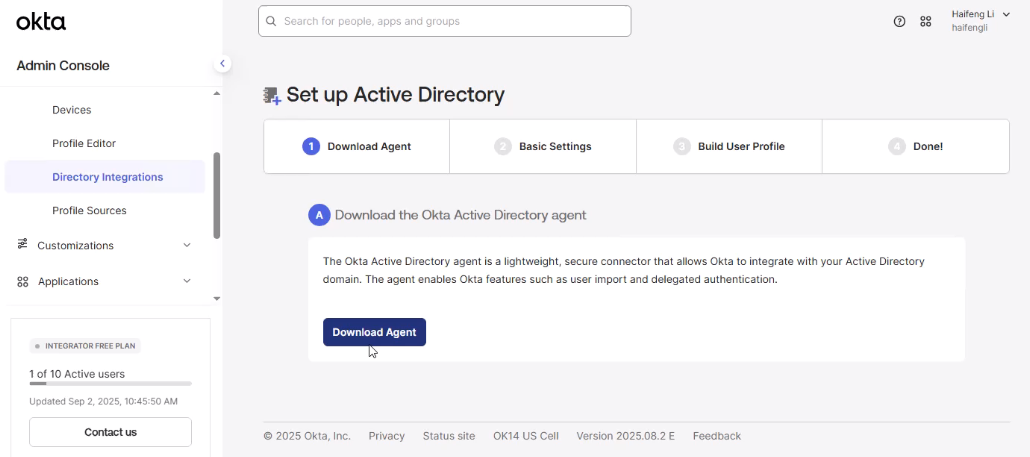
- Install it on a domain-joined server (recommended: not the Domain Controller).
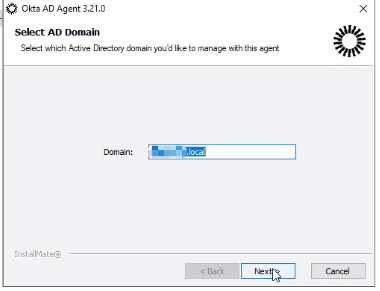
- During setup:
- Enter your AD domain (e.g.,
example.local).

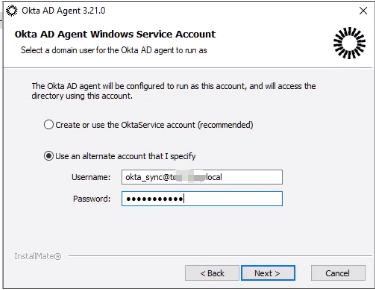
- Provide AD service account credentials (
okta_sync@DOMAIN).
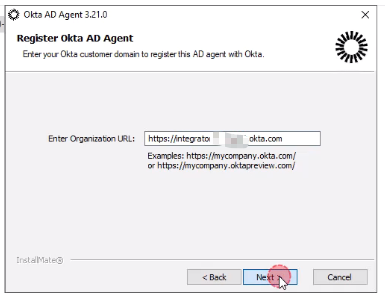
- Enter your Okta domain (e.g.,
https://integration-******.okta.com).
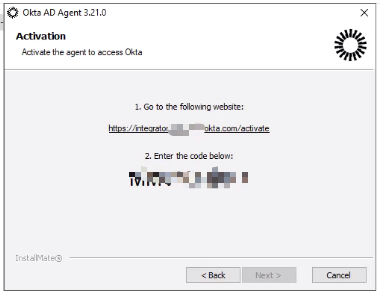
- You must enter the activation code shown in the installer to link the agent with your tenant.After successful activation, the browser will automatically move to the next step.
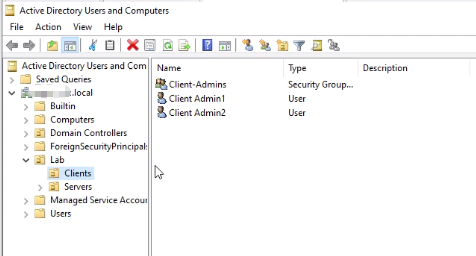
- Select the OUs to sync (best practice: only include user OUs, not service accounts).

- Enter your AD domain (e.g.,
- After installation, confirm the Agent status is Active in the Okta Admin Console.
4. Import and Activate AD Users
- Import: In Okta Admin Console → Directory Integrations → Active Directory → Import Now.
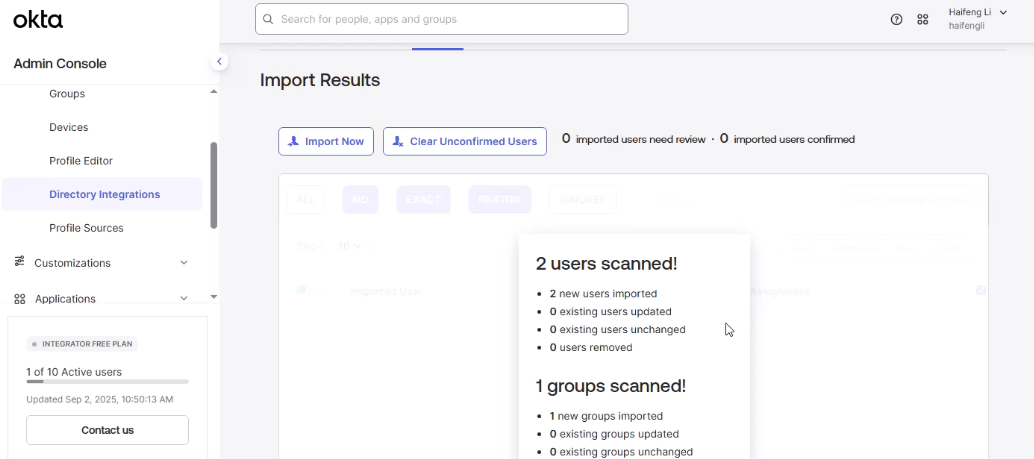
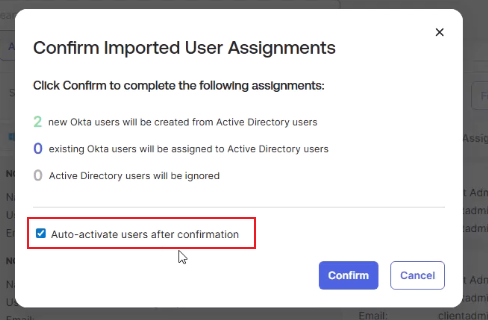
- Activate: Imported users are initially in Staged status. They must be Activated to log in.
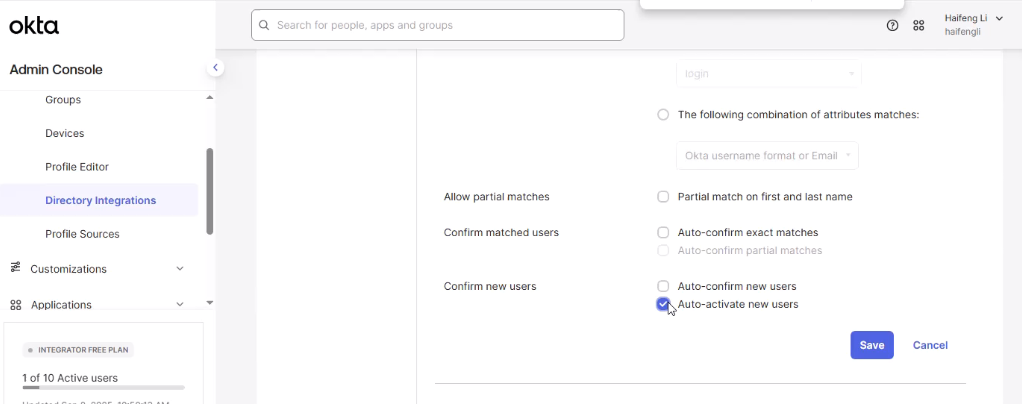
- Optionally configure Import Rules to Auto-activate new users.
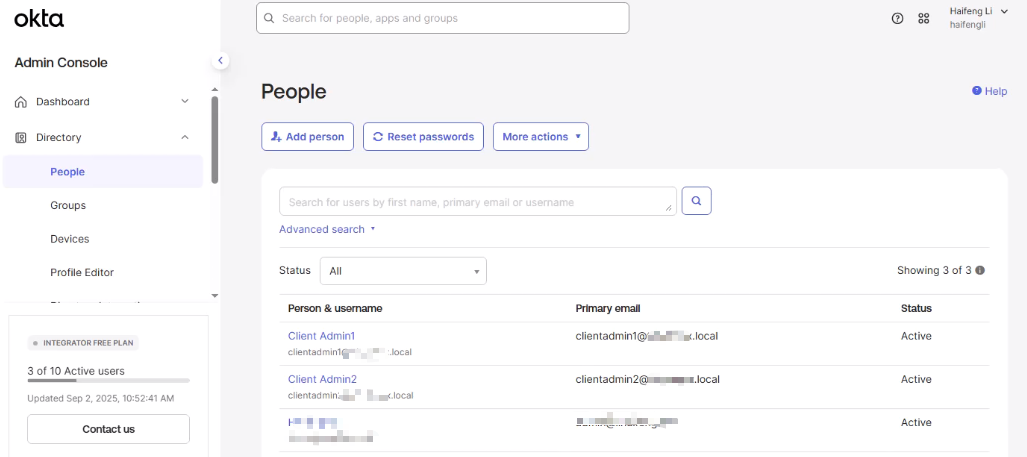
- Verify under Directory → People that your users are listed and active.
5. Add the Symantec Web Security Service App
Instead of manually creating a SAML app, use the Okta Integration Network:
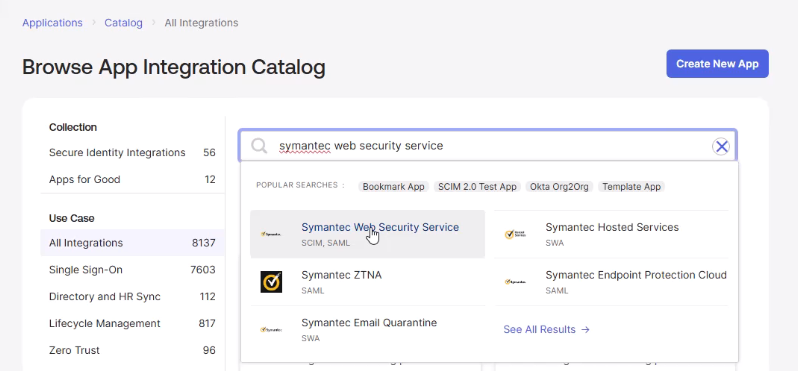
- Go to Applications → Browse App Catalog.
- Search for Symantec Web Security Service and click Add Integration.
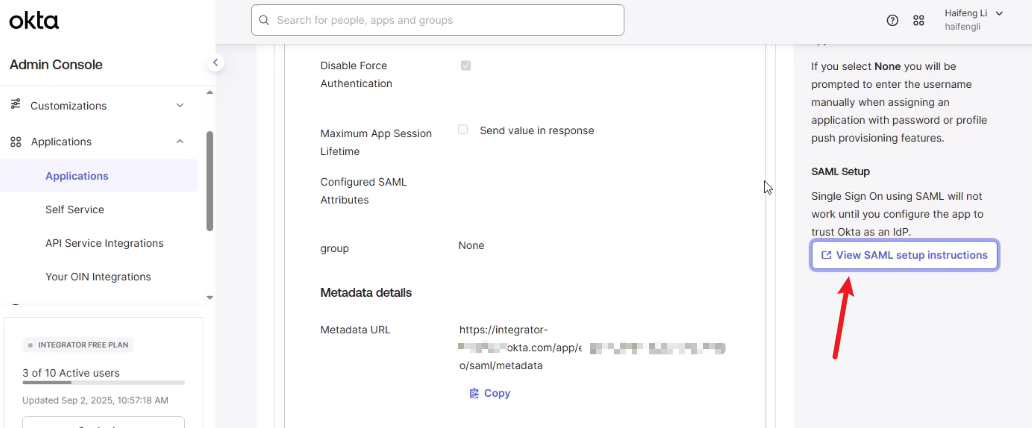
- In the Sign On tab, click View SAML setup instructions to download Okta Metadata (
metadata.xml).
6. Enable SCIM Provisioning
SCIM allows Okta to automatically sync users and groups into Cloud SWG:
- In Okta, go to the WSS application → Provisioning.
- Click Configure API Integration → Enable API Integration.
- In Cloud SWG Portal: Identity → SAML Authentication → SCIM Third-Party Users & Groups Sync.
- Generate an Integration Token, copy the SCIM Base URL and Token.
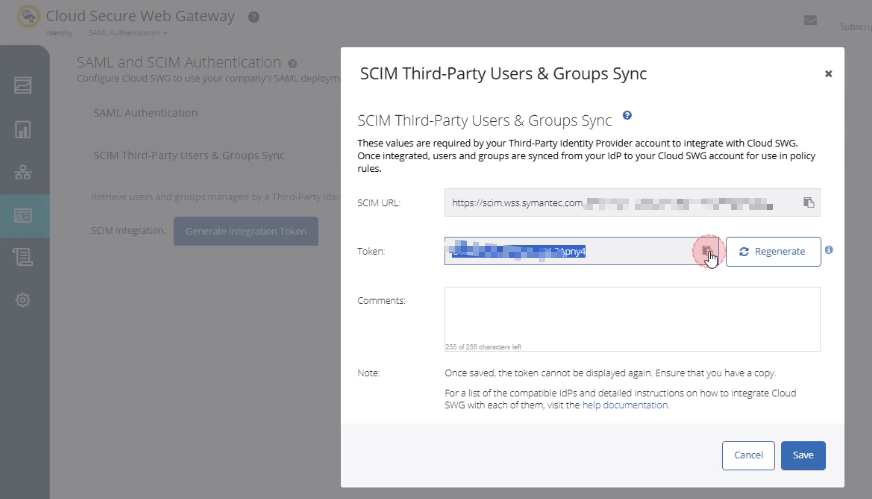
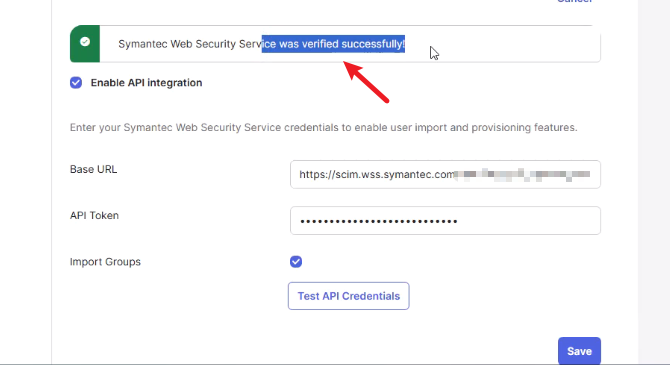
- Back in Okta, paste the SCIM Base URL and Token into the API configuration.
- Test API Credentials → Okta should show “Symantec Web Security Service was verified successfully!”
- In Provisioning tab, select To App, and Enable:
- Create Users
- Update User Attributes
- Deactivate Users
7. Assign Users and Groups
- In Okta, open the WSS application:
- Assignments → assign to People or Groups.
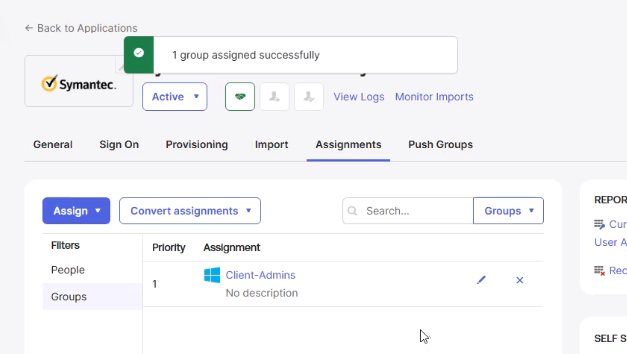
- Push Groups → choose groups by name, push them to Cloud SWG.
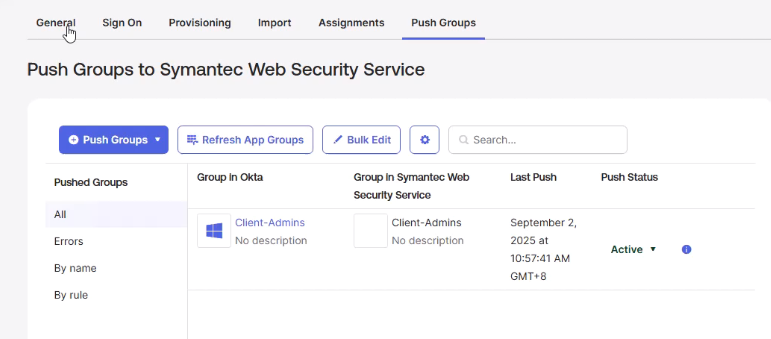
- Verify in Cloud SWG Portal that users and groups are synced.
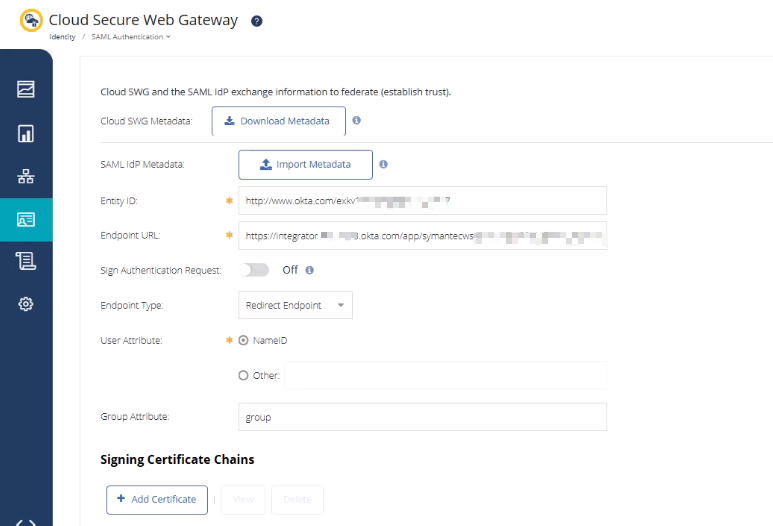
8. Configure Cloud SWG for SAML
- In Cloud SWG Portal → Identity → SAML Authentication.
- Click Import Metadata, upload Okta IdP Metadata.
- Cloud SWG automatically populates:
- Entity ID (Issuer)
- SSO Endpoint URL
- Signing Certificate
- Select Post Endpoint.
- In Group Attribute, enter: group
- Save the configuration.
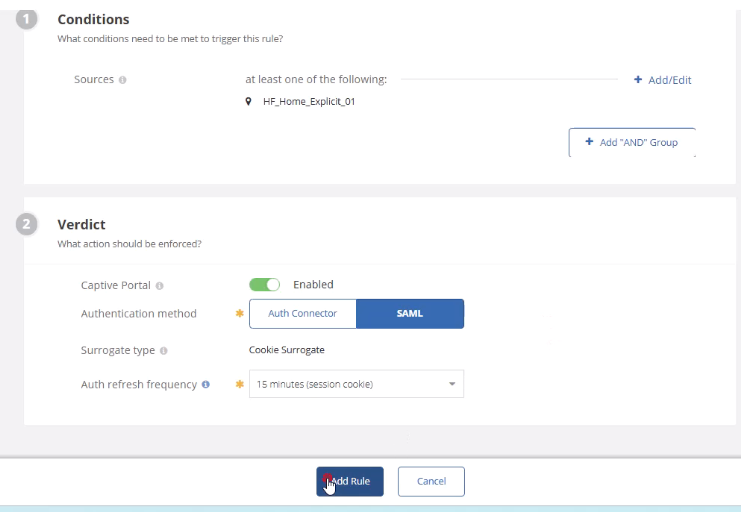
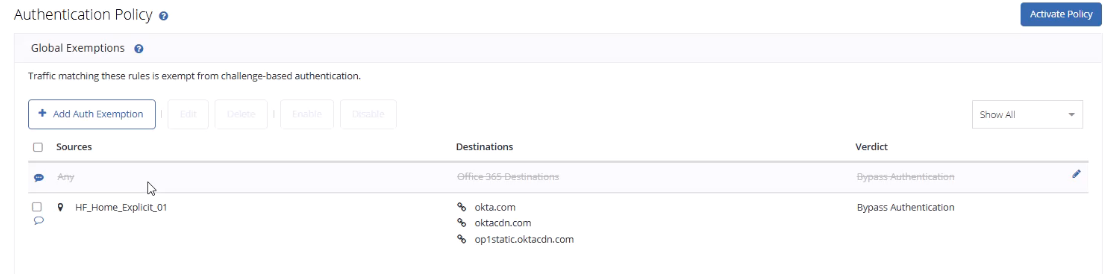
- Add an Authentication Policy in Cloud SWG:
- Condition: Target location (e.g., Explicit Proxy test location)
- Action: Captive Portal → SAML (Okta)
- Bypass required domains: To ensure the Okta login page and static resources load correctly through Cloud SWG, add the following domains to the Authentication Bypass.
okta.com
oktacdn.com
op1static.oktacdn.com
9. Testing Authentication
- Configure your client proxy.
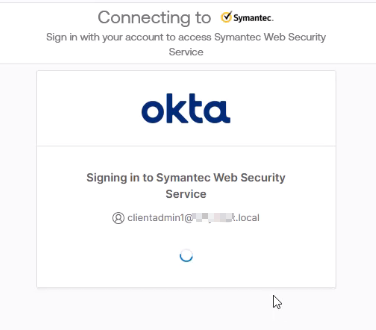
- Open a browser and attempt to access any website.
- The client is redirected to Okta’s login page.
- Log in using AD credentials (UPN or email).
- Upon success, Cloud SWG allows the connection.
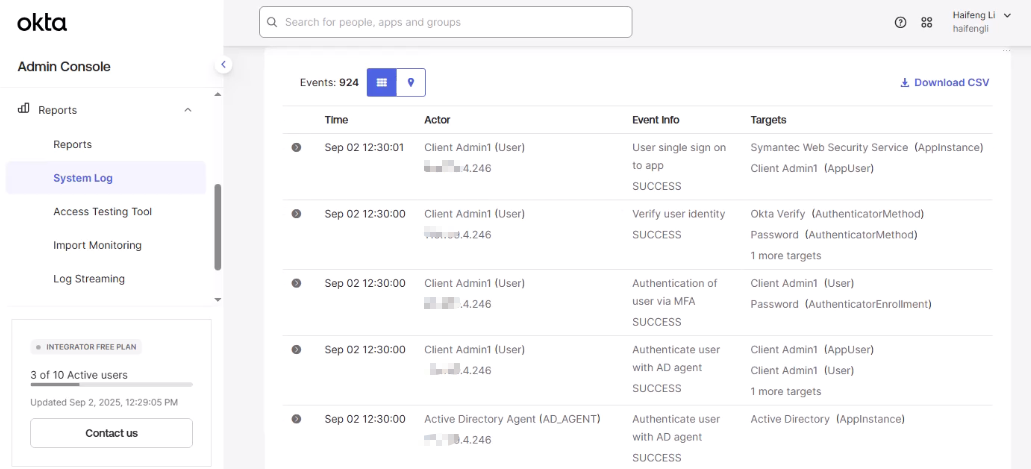
- Check Okta System Log and Cloud SWG logs for authentication success/failure.
10. Troubleshooting
- User not imported: Check OU selection, ensure attributes (lastName, UPN) are populated.
- Login failure (VERIFICATION_ERROR): User is not activated or AD password validation failed.
- SAML response rejected: Confirm ACS URL is
/bcsamlpostand Entity ID matches. - Infinite redirect loop: Add
okta.com,oktacdn.com, andop1static.oktacdn.comto Cloud SWG Authentication Bypass list.
Conclusion
With Okta integrated into Cloud SWG:
- Users can log in using their AD credentials.
- User/group provisioning is automatic via SCIM.
- Cloud SWG enforces fine-grained policies based on user identity and groups.
Key lessons learned:
- Okta requires users to have
firstName,lastName, and UPN/mail. - Users must be Activated after import to log in.
- Use Okta’s Integration app instead of manually building a SAML app.
This integration streamlines authentication, simplifies user lifecycle management, and enhances security posture.
Recent Comments