Integrating Symantec Cloud SWG with Azure Entra ID (SAML SSO)
Introduction
Symantec Cloud SWG (formerly Web Security Service, WSS) provides cloud-based secure web gateway functionality, enforcing traffic inspection and access policies.
Azure Entra ID (formerly Azure Active Directory) is Microsoft’s identity platform that supports SAML 2.0.
By integrating Cloud SWG with Entra ID, organizations can enable Single Sign-On (SSO) for secure web access, centralize identity management, and improve user experience.
Prerequisites
Before starting, make sure you have:
- Admin access to Azure Entra ID
- Admin access to the Cloud SWG portal
- A custom domain that you own and can manage (e.g.,
yourdomain.com) - Explicit Proxy/VPN or agent connectivity to Cloud SWG (not covered in this tutorial)
When using the SES/WSS Agent as the connection method, specify WSS Agent as the source in the relevant policy definitions.
Verify a Custom Domain
If you want users to log in with user@yourdomain.com, you must verify your domain in Entra ID:
- Go to Azure Portal → Entra ID → Custom domain names
- Select + Add custom domain
- Enter your domain, e.g.,
lihaifeng.net - Copy the TXT record(or MX) provided by Microsoft and add it to your DNS provider
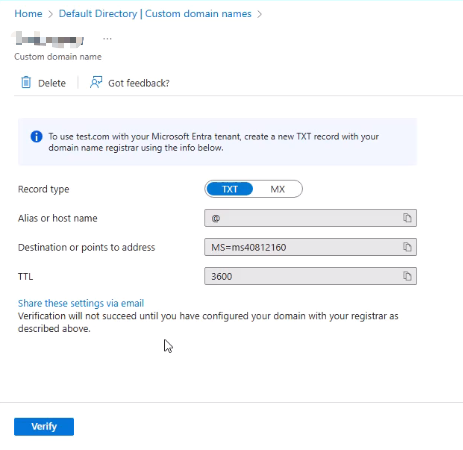
- Once DNS propagation is complete, return to the portal and select Verify
- After verification, the domain will be available for user UPNs
⚠️ Without domain verification, Entra ID accounts can only use the
onmicrosoft.comsuffix.
Azure Entra ID Configuration
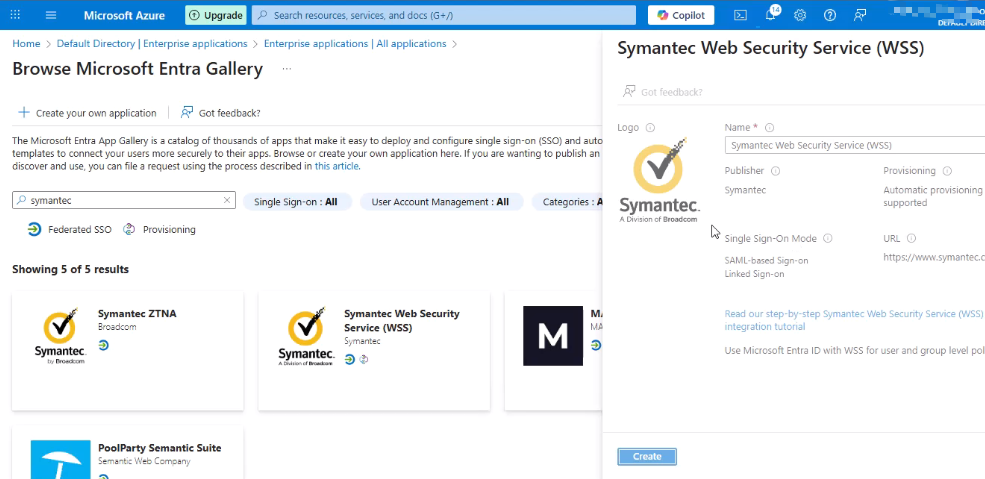
- Sign in to Azure Portal → Entra ID → Enterprise applications
- Select New application → Create application
- Search for Symantec Web Security Service (WSS)
- Create the application
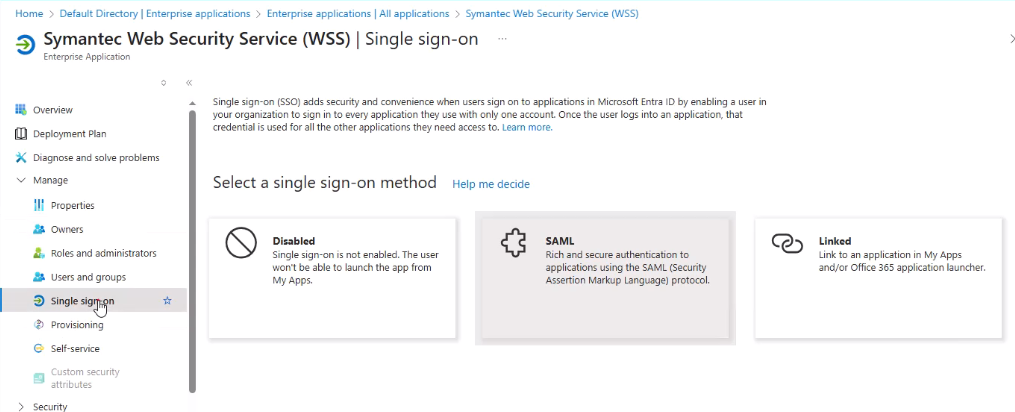
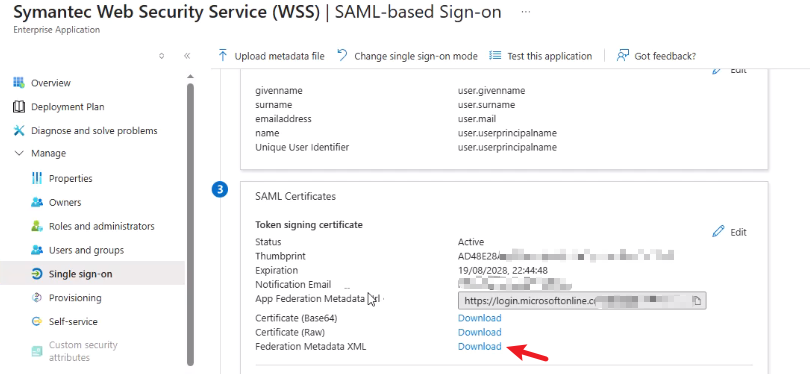
- In the application page → Single sign-on → choose SAML
- Configure the basic parameters:
- Identifier (Entity ID):
https://saml.threatpulse.net:8443/saml/saml_realm - Reply URL (ACS URL):
https://saml.threatpulse.net:8443/saml/saml_realm/bcsamlpost
- Identifier (Entity ID):
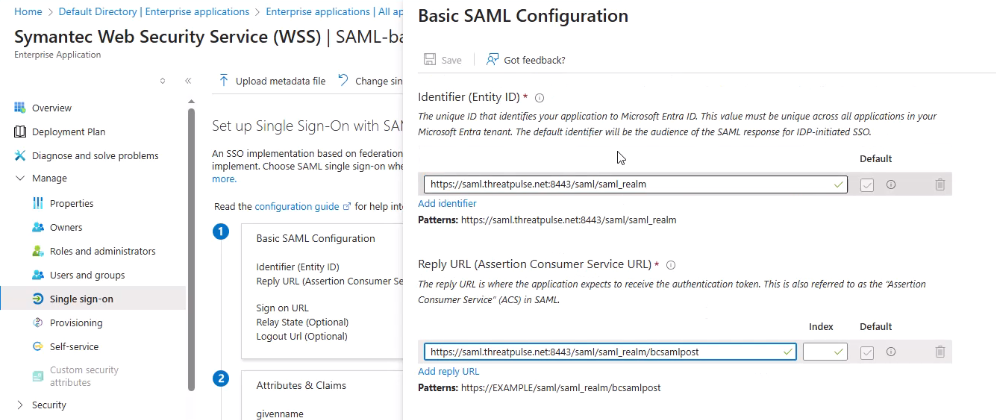
- Under SAML Certificates, download the Federation Metadata XML for later use
User and Group Assignment
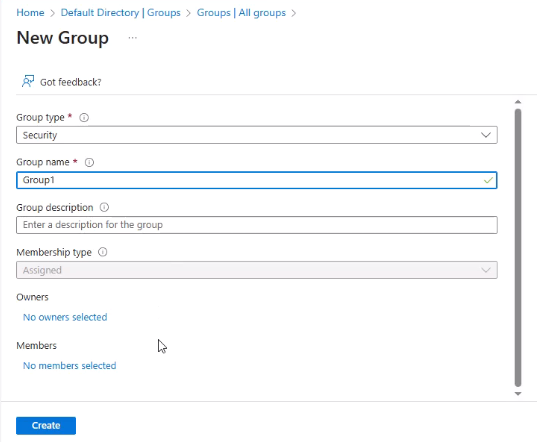
- In Entra ID → Groups, create a new group
- Ensure the Group type is set to Security
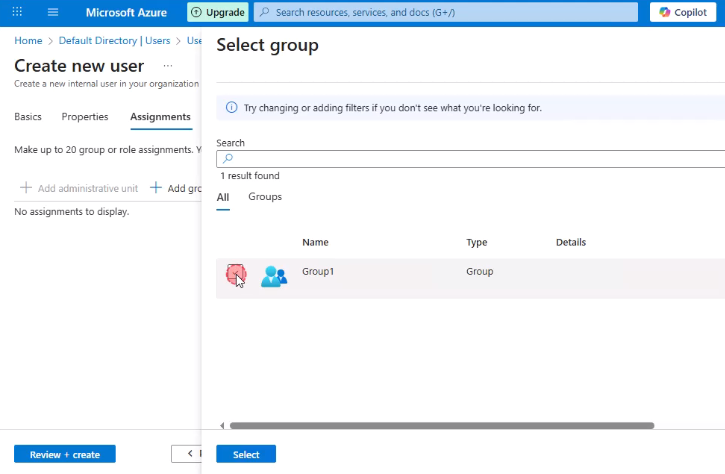
- Go to the Users tab → create a new user
- Choose the verified domain as the UPN suffix


- Assign the user to the group created earlier
- In the application Symantec Web Security Service (WSS) → Users and groups
- Select + Add user/group
- Add the created user
- Alternatively, assign the security group so that all members gain access (requires a higher plan level)

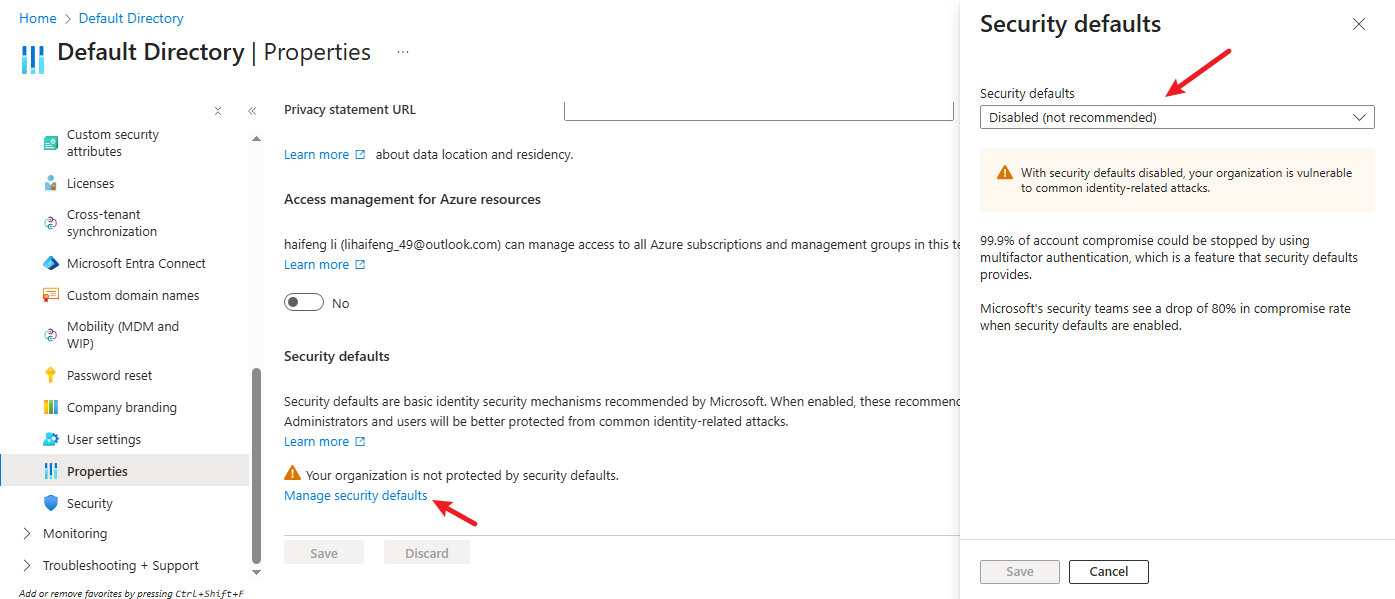
- For testing purposes, disable two-step verification:
- Entra ID → Properties → Manage security defaults
- Set to No and save
Configure Cloud SWG with Entra ID as IdP
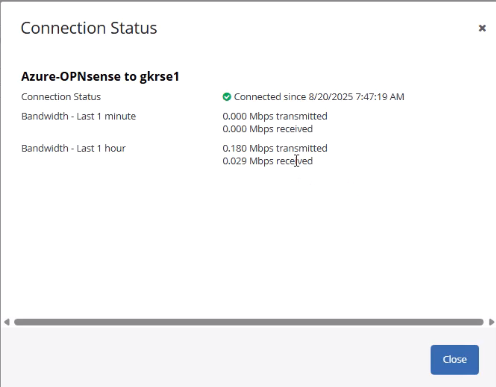
- Log in to the Cloud SWG portal → Locations → create a location
 (This guide focuses on authentication; VPN configuration steps are omitted. Once VPN connectivity is established, the status should show as connected.)
 - In the Cloud SWG portal → Identity → SAML and SCIM Authentication
- Upload the Federation Metadata XML downloaded from Entra ID
- The certificate and related settings will be configured automatically
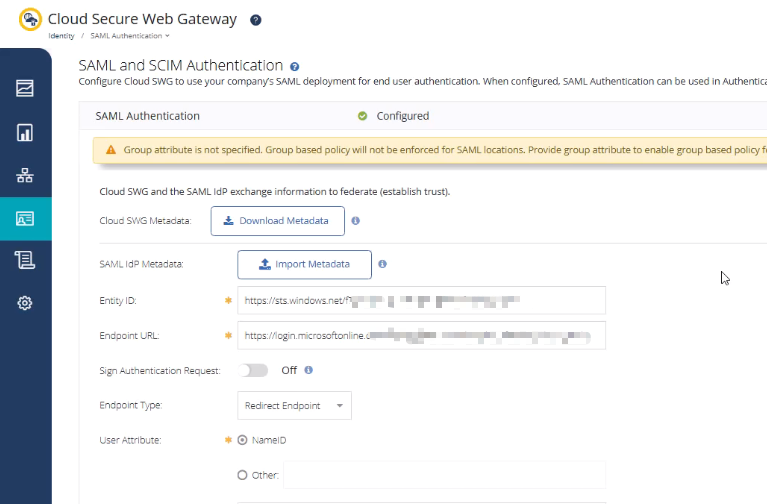
- Save the configuration
- If necessary, configure SSL Intercept and upload certificates, or define other policies (not covered in this guide)
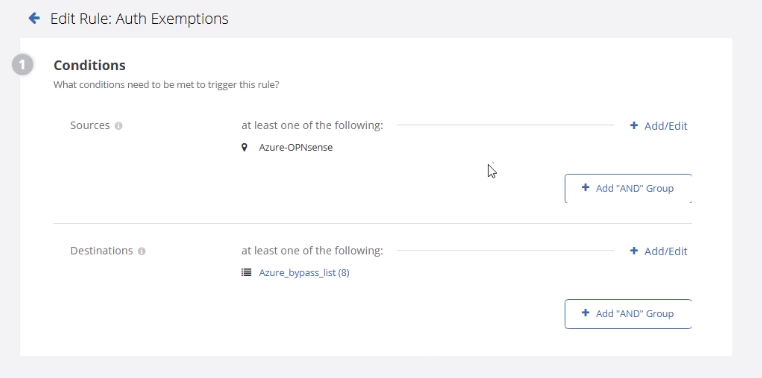
Adjust Authentication Policies
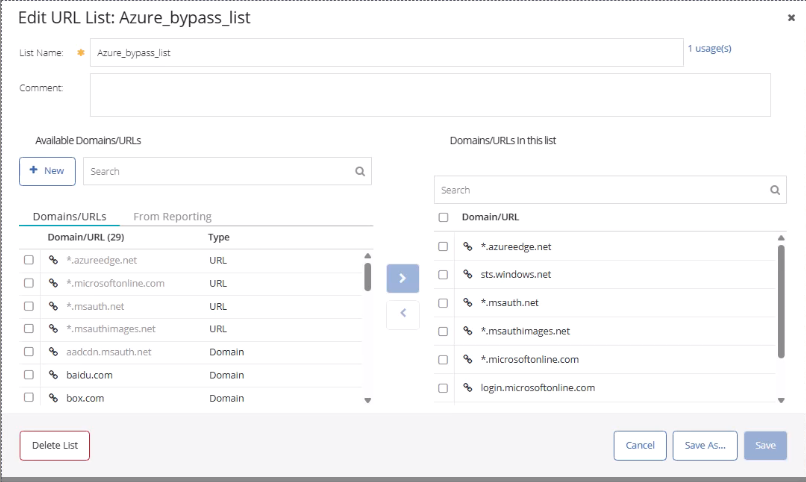
- Ensure Azure AD endpoints are bypassed from authentication to avoid SSO loops:
login.microsoftonline.com
secure.aadcdn.microsoftonline-p.com
aadcdn.msauth.net
*.msauth.net
*.msauthimages.net
*.microsoftonline.com
*.azureedge.net
sts.windows.net
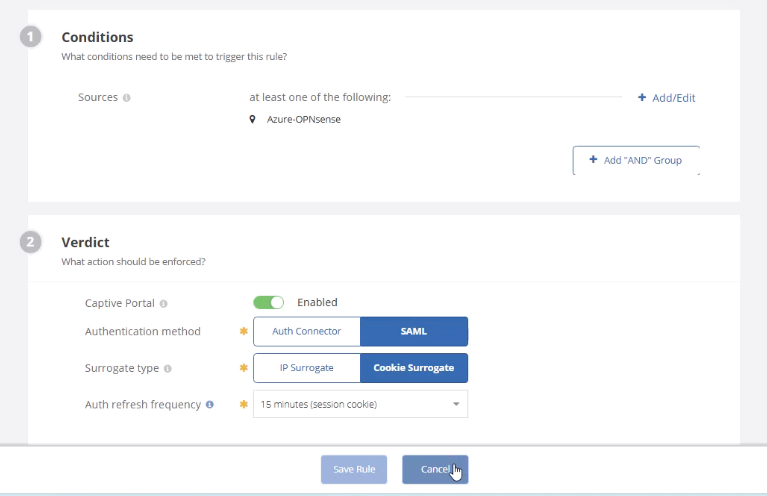
- In Authentication policy, create an authentication rule:
- Apply to your test location
- Require SAML authentication
- For testing, you can use cookie-based sessions
Test the Integration
- Connect your client through Cloud SWG (via agent, PAC, or VPN)
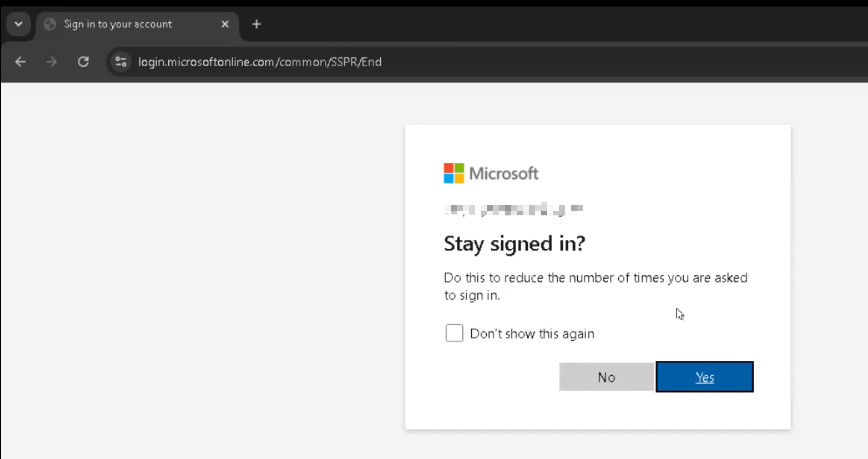
- Open a browser and attempt to access an external website
- You should be redirected to the Microsoft login page
- Sign in with your Entra ID account (
user@yourdomain.com)
- After successful authentication, access should be granted through Cloud SWG
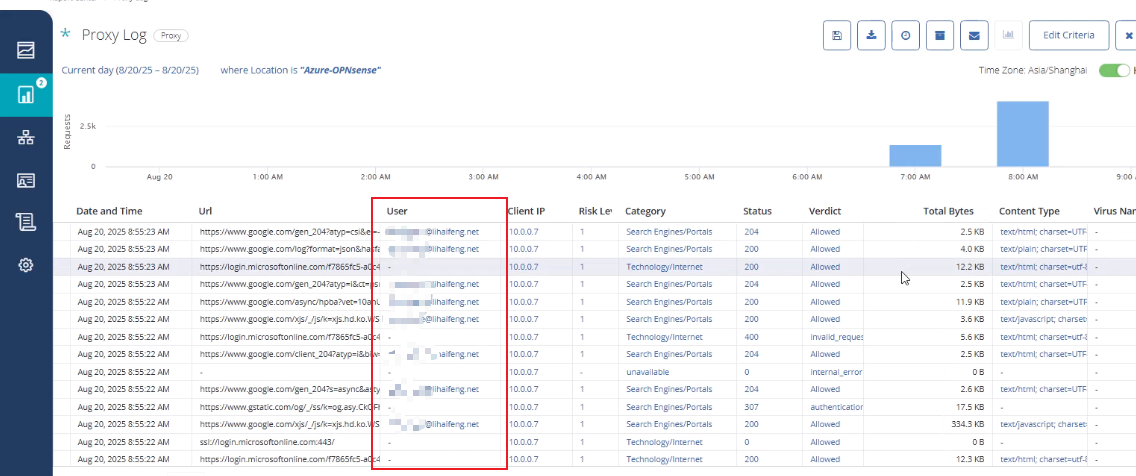
- In the Cloud SWG portal → Reports, confirm that events are logged
Conclusion
By integrating Symantec Cloud SWG with Azure Entra ID using SAML, you can centralize identity management, enforce authentication consistently, and improve the end-user experience.
Provision Users from Microsoft Entra ID to Cloud SWG via SCIM
Updated on October 23, 2025
- In Cloud SWG Portal: Identity → SAML Authentication → SCIM Third-Party Users & Groups Sync.
- Generate an Integration Token, copy the SCIM Base URL and Token.
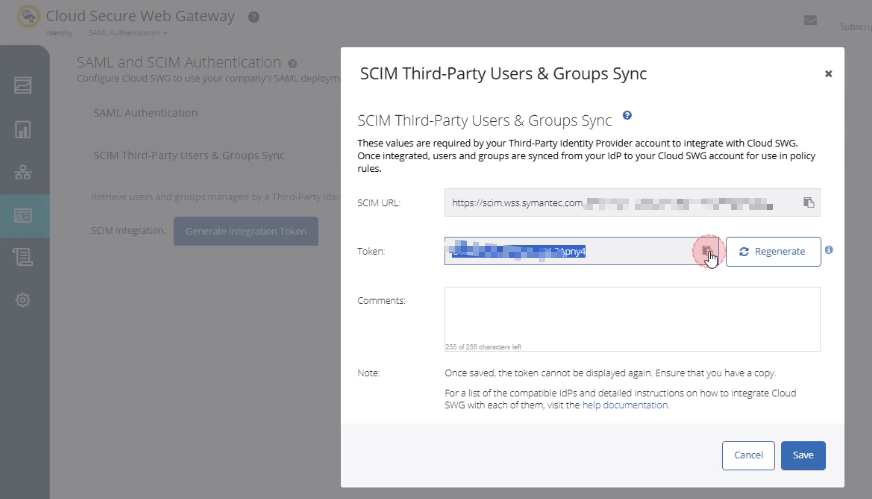
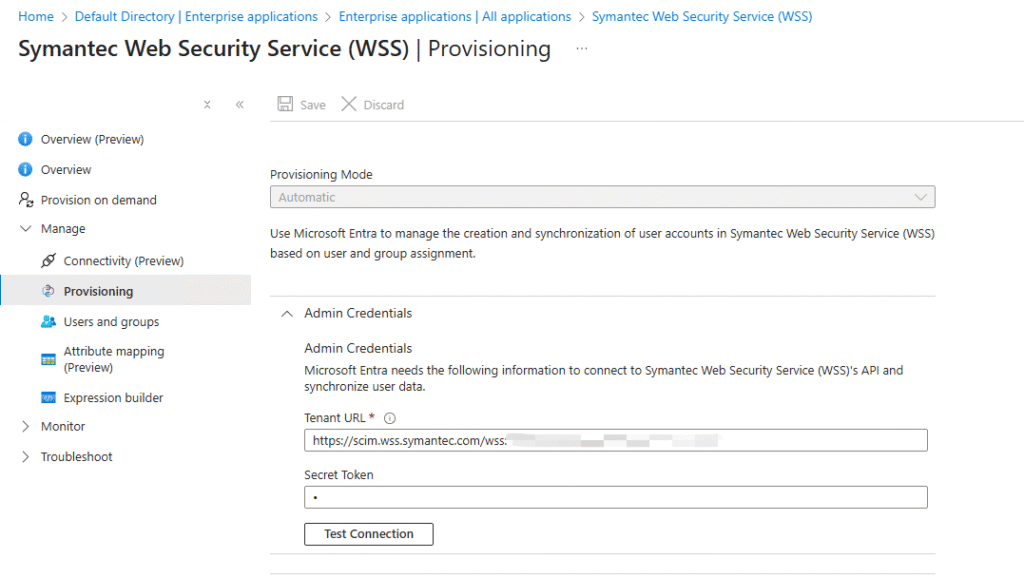
- In Azure Portal, open the Symantec Web Security Service (WSS) app → Provisioning tab.
- Click Get Started (if not yet configured).
- Set Provisioning Mode to Automatic.
- In Tenant URL, enter SCIM URL.
- In Secret Token, paste the SWG SCIM Token.
- Click Test Connection, verify success, then Save.
- Go to Provisioning → Provision on demand.
- Select the test user → click Provision.
- If you see Modified attributes (successful), the provisioning succeeded.
Recent Comments