Deploying Symantec VIP Enterprise Gateway on Ubuntu with Active Directory Integration
In my lab environment, I deploye Symantec VIP Enterprise Gateway(EG) and integrated it with a Windows Active Directory domain controller to enable multi-factor authentication (MFA). During the process, I encountered some DNS resolution issues with .local domains on Ubuntu and user lookup issues with LDAP. This article provides the complete steps, from installation to testing login via MyVIP.
1. Prerequisites
- Ubuntu Server 20.04 / 22.04
- Windows Server (Active Directory domain controller with DNS and LDAP enabled)
- A regular AD user account to act as the Bind user, e.g.,
vip_svc@example.local
2. Install Dependencies
The EG installer requires the following system libraries:
sudo apt update
sudo apt install -y libgcc-s1 libstdc++6 libc6 libnss3 libidn2-0 unzip
Check installation:
dpkg -l | grep -E "libgcc|libstdc|libc6|libnss|libidn2"
3. Install VIP Enterprise Gateway
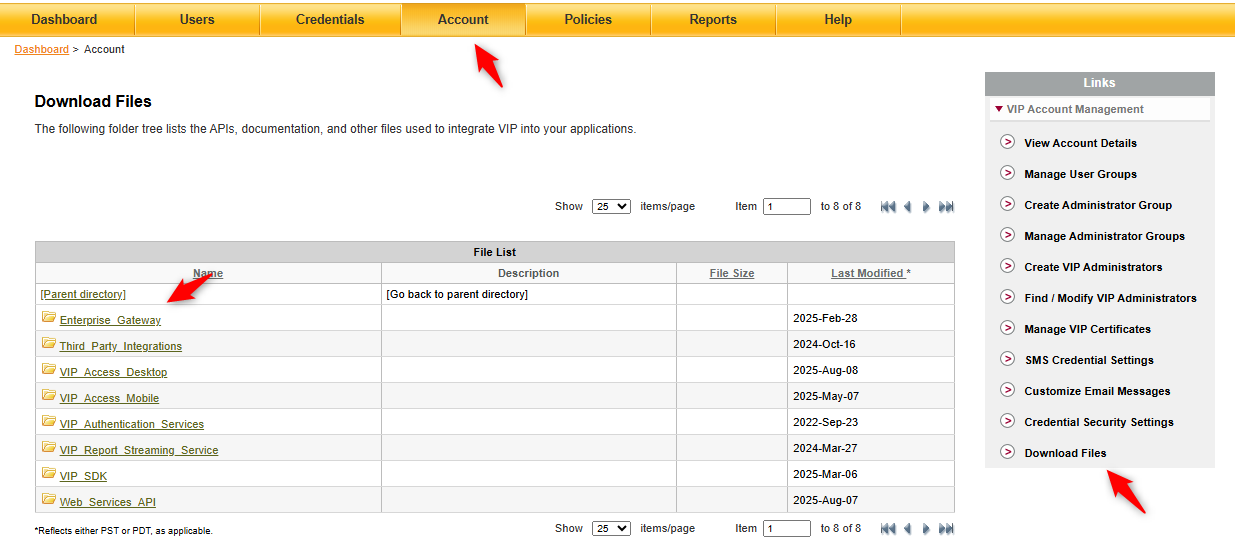
Log in to VIP Manager → Account → Download Files → Enterprise_Gateway, then download the Linux installer (.tar) for your server.
Extract and run the installer:
tar -xvf VIP_Enterprise_Gateway_9_11_0_LINUX.tar -C /opt/vip-eg
cd /opt/vip-eg
chmod +x *.bin
sudo ./VIP_Enterprise_Gateway_9_11_0.bin -i console
After installation, the EG management console is available at:
https://<EG_IP>:8232/vipui
4. Fix DNS Issues for .local Domains
When the AD domain is example.local, Ubuntu treats .local as mDNS by default, which breaks DNS resolution.
Update Netplan Configuration
Edit /etc/netplan/00-installer-config.yaml:
network:
  version: 2
  ethernets:
    ens192:
      addresses:
        - 172.16.30.121/24
      routes:
        - to: default
          via: 172.16.30.1
      nameservers:
        search: [example.local]
        addresses:
          - 172.16.30.114   # AD DNS
          - 172.16.30.115   # Secondary AD DNS (optional)
Apply changes:
sudo netplan apply
Update systemd-resolved
Edit /etc/systemd/resolved.conf
[Resolve]
DNS=172.16.30.114
Domains=~example.local
LLMNR=no
MulticastDNS=no
Restart service:
sudo systemctl restart systemd-resolved
Verify:
resolvectl query _ldap._tcp.example.local
5. Configure Active Directory
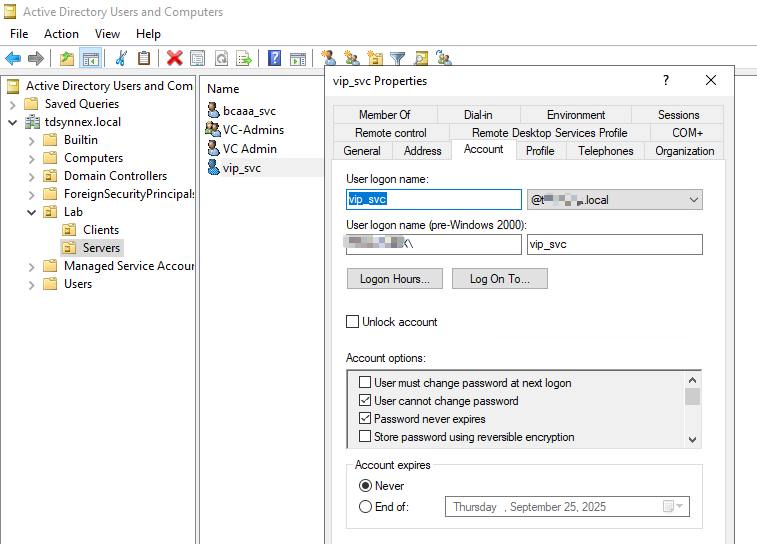
Create a Bind User
On the domain controller:
- Open Active Directory Users and Computers (ADUC)\
- Create a user
vip_svc - Set properties:
User logon name:vip_svc@example.local- Enable Password never expires
This user only needs read permissions (default for normal users).
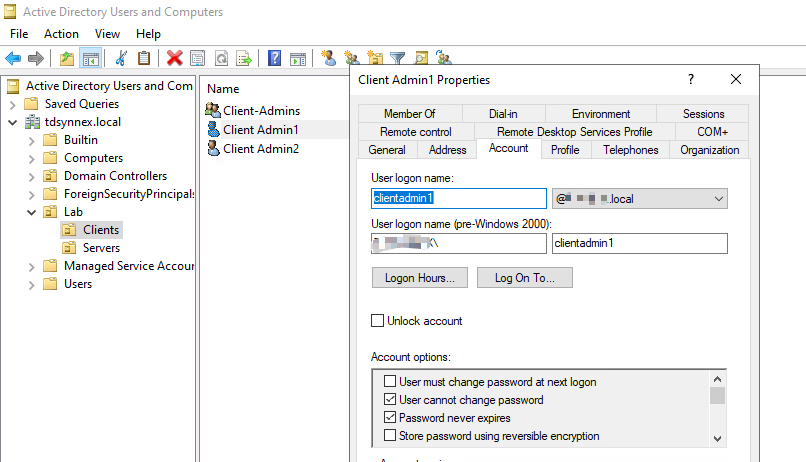
Confirm Test User
Example: clientadmin1
- UPN:
clientadmin1@example.local - sAMAccountName:
clientadmin1
6. Configure EG User Store
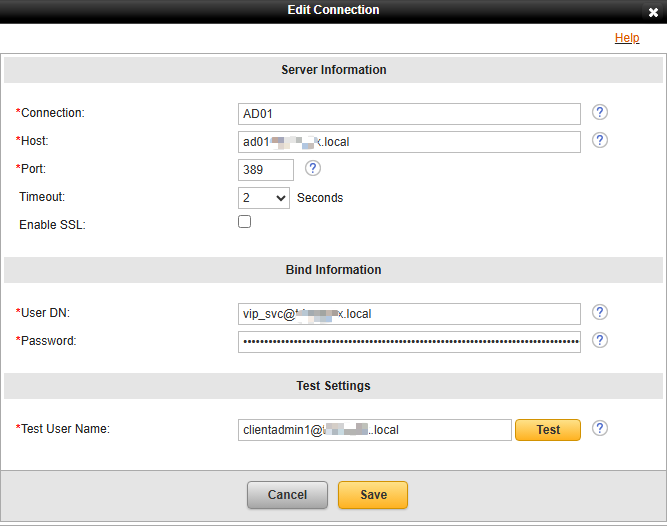
In the EG console:
User Stores → Add
Settings:
- Connection Name: AD01
- Host: 172.16.30.114
- Port: 389\
- User DN:
vip_svc@example.local - Password: Bind user password
- Base DN:
DC=example,DC=local
Enable: ✅ Edit Default VIP User Name Attribute → sAMAccountName
User Filter:
(&(&(objectClass=user)(objectCategory=person))(sAMAccountName=%s))
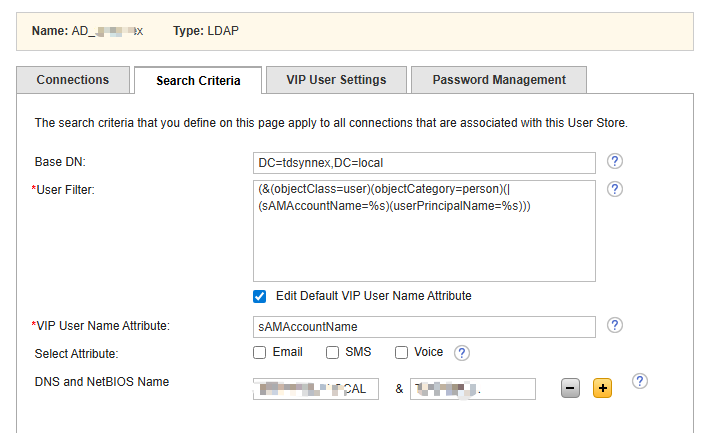
Test user login:
clientadmin1
clientadmin1@example.local
7. Configure Self Service Portal (MyVIP)
Go to:
Identity Providers → Self Service Portal IdP
Key settings:
- My VIP URL:
http://<EG_IP>:8233/myvip - Enable My VIP: Yes
- Redirect SSP to MyVIP: ON
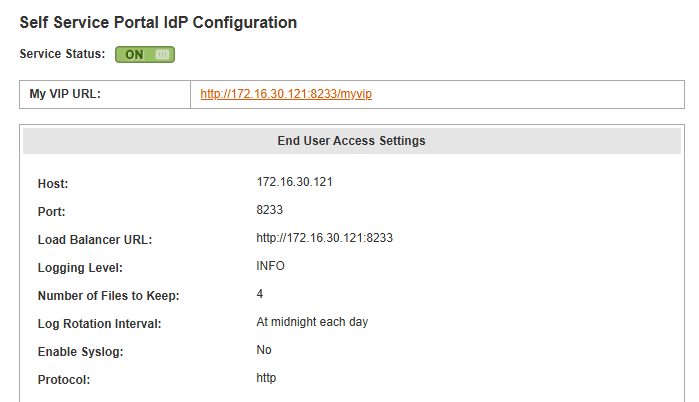
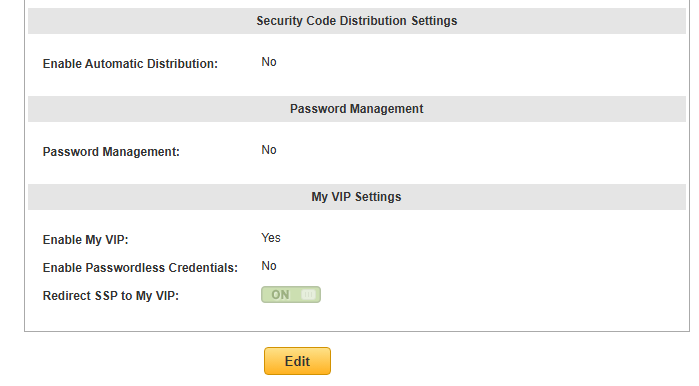
8. Test MyVIP Login
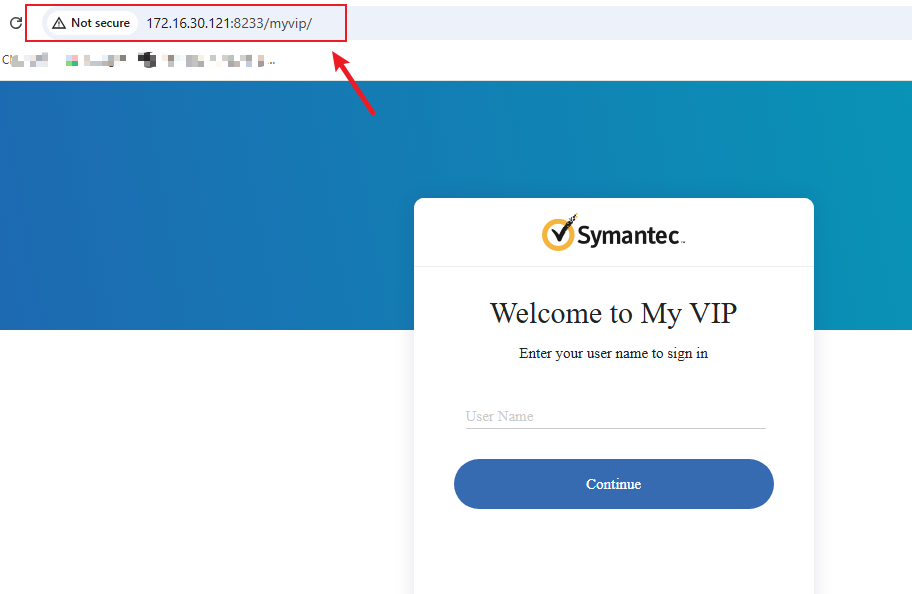
- Open browser and go to:http://<EG_IP>:8233/myvip

- Enter AD user credentials:
- Username:
clientadmin1 - Password: AD password
- Username:
- First login → prompted to register a credential (VIP Access App / hardware token)
- Next logins → require OTP or push approval
- Once logged in, users can:
- View/manage their registered credentials
- Test OTP codes
- Update MFA settings

9. Verifying User Store Synchronization in VIP Manager
Once the User Store is configured in EG and AD authentication works, you can confirm synchronization in VIP Manager:
- Log in to VIP Manager.
- Navigate to the Users tab.
- Search for an AD user that you tested in EG (e.g.,
clientadmin1). - If integration is successful, the user will appear with details such as:
- Username (from AD)
- Credential status (e.g., VIP Access app registered or not)


Recent Comments