How to configure Splash Page Redirect (WLC + ISE)
In this post I will show how to configure Splash Page Redirect.
The logic of Splash Page Redirect is to use 802.1X for identity authentication. When the authenticated user tries to access the webpage, the client will be redirected to the designated webpage. After the redirection is over, the user will get full access. the authentication method may seem redundant, but it provides more choices for the businesses.
Network topology in the example
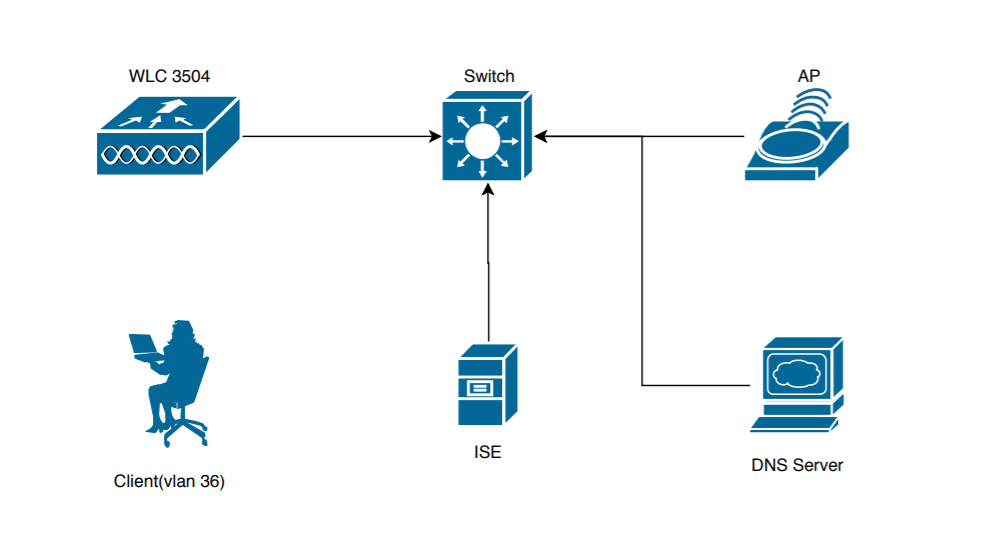
In this example, the wireless part uses a Cisco 3504 Wireless Controller and a Cisco Aironet 1850 Series Access Points, with Cisco Identity Services Engine (ISE) as the external AAA server. Because it is a local area network environment, I used another Windows server 2016 as the DNS server. These devices are connected to a WS-C3850-48P-E, and the switch also acts as a DHCP server.
The WLC and ISE versions are as follows.
ISE Version:2.7.0.268
WLC Version:8.10.105.0
WLC configuration
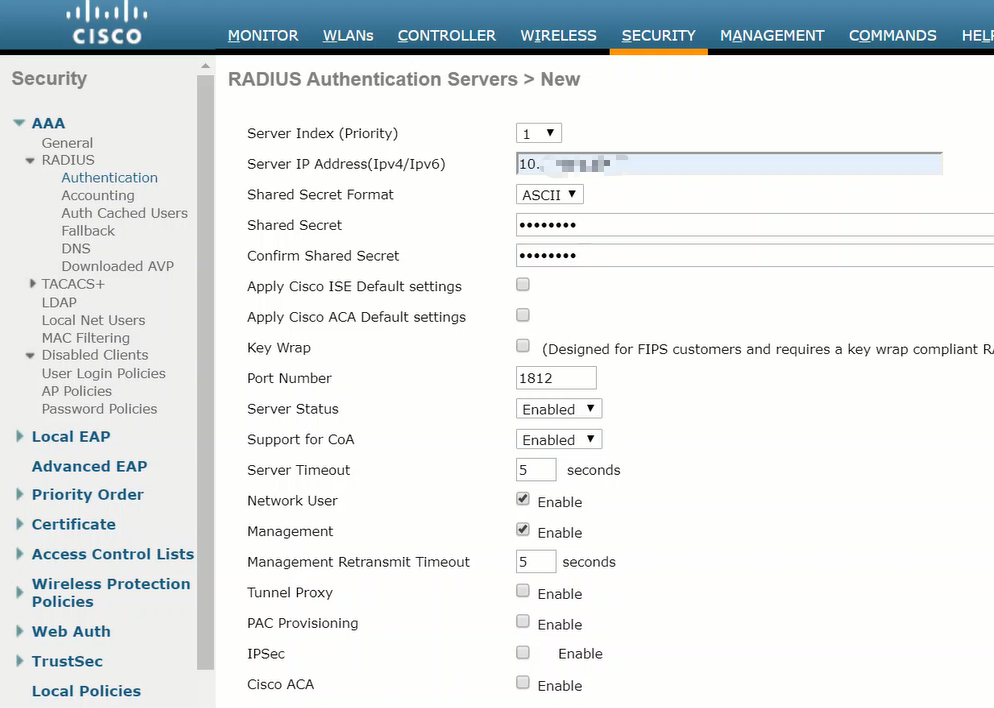
- Add ISE to WLC
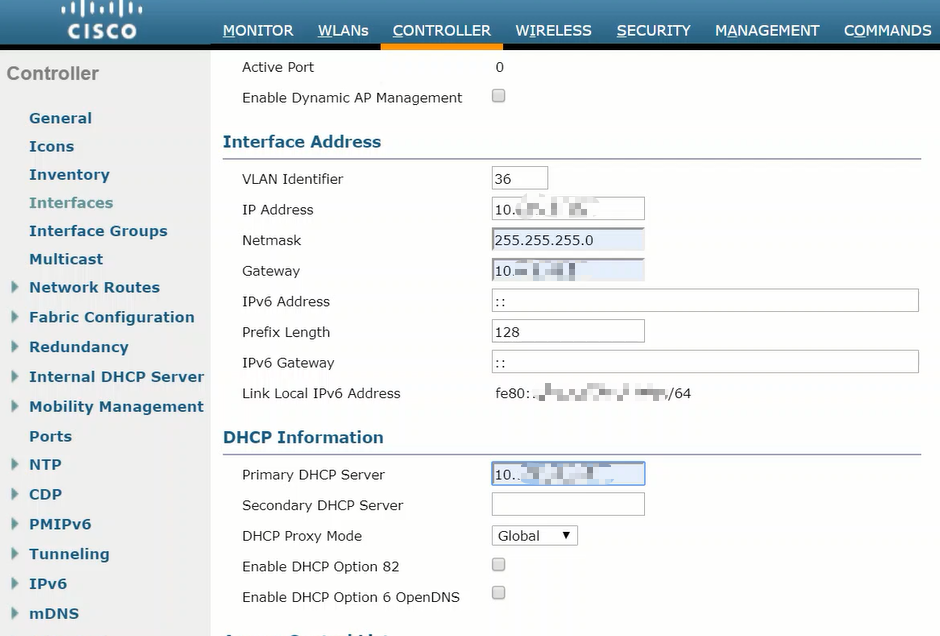
- Adding a dynamic interface
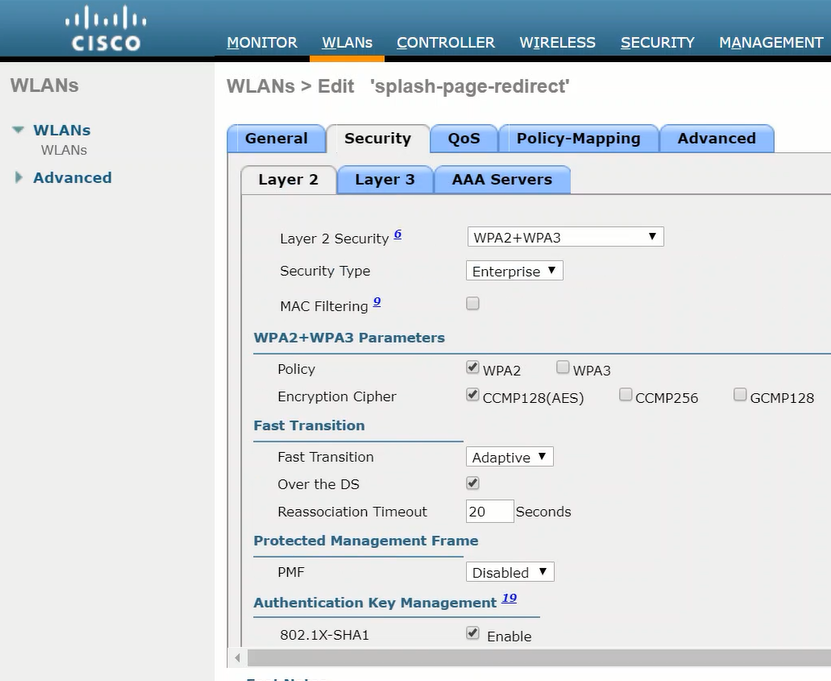
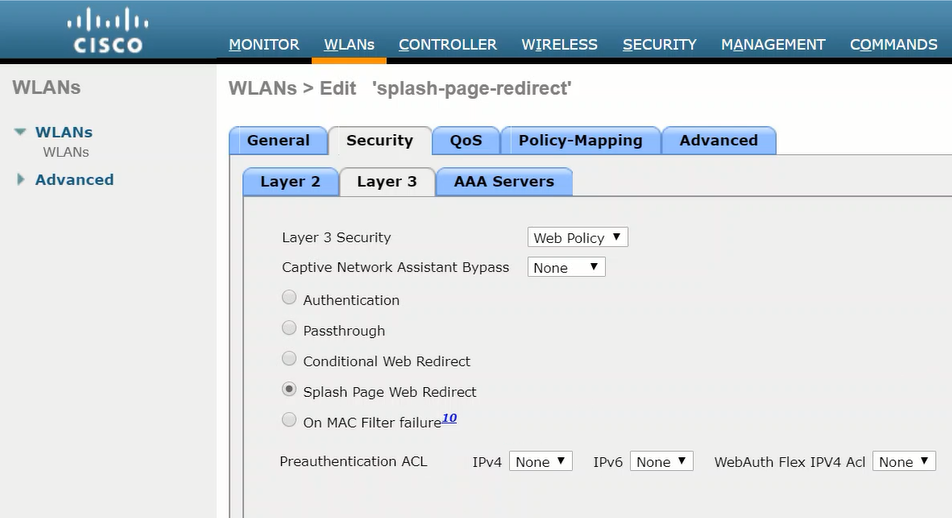
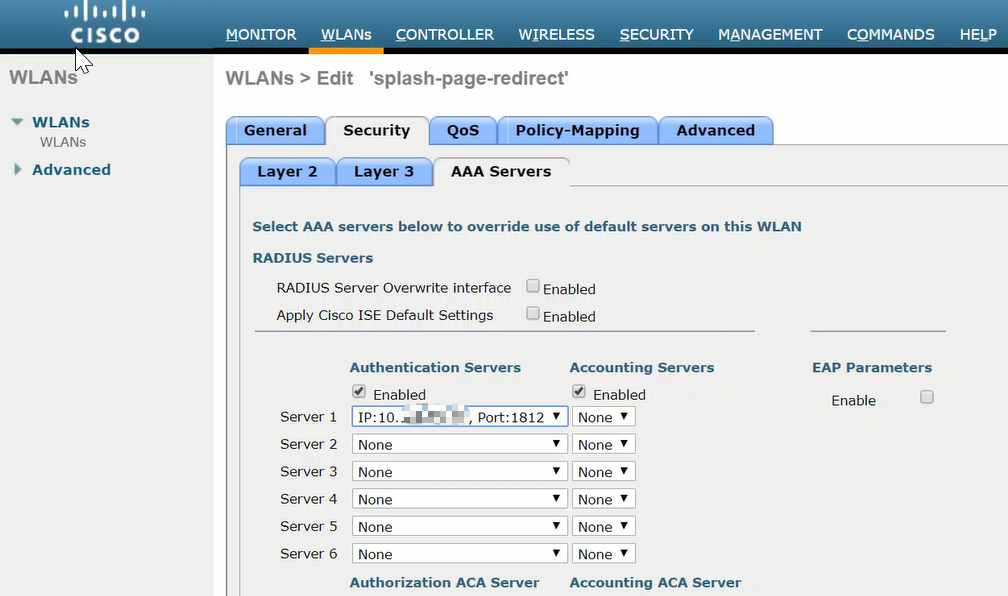
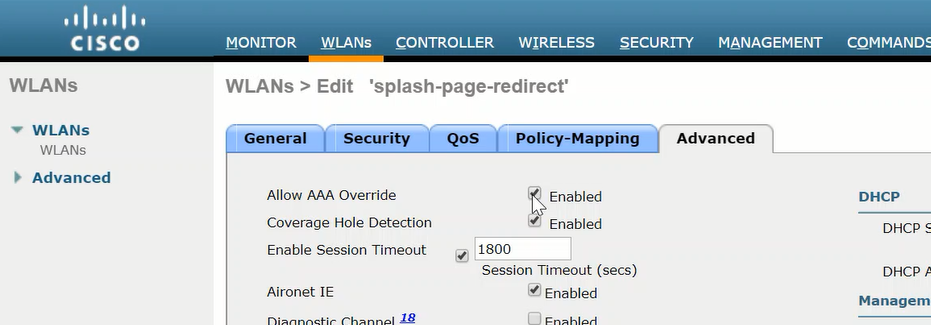
- Configure WLAN
Configure ISE
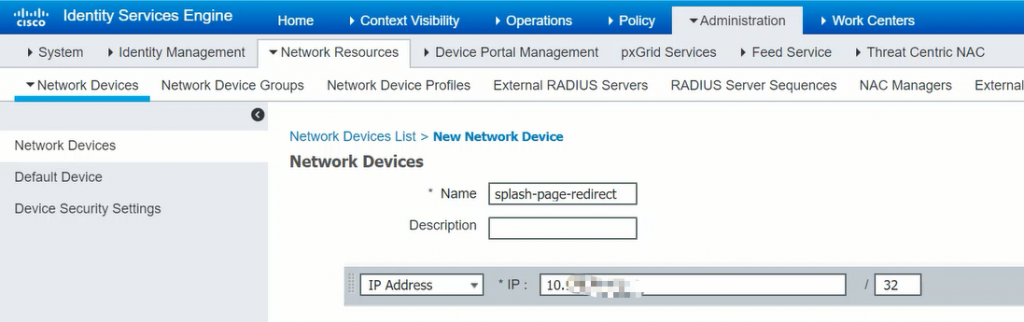
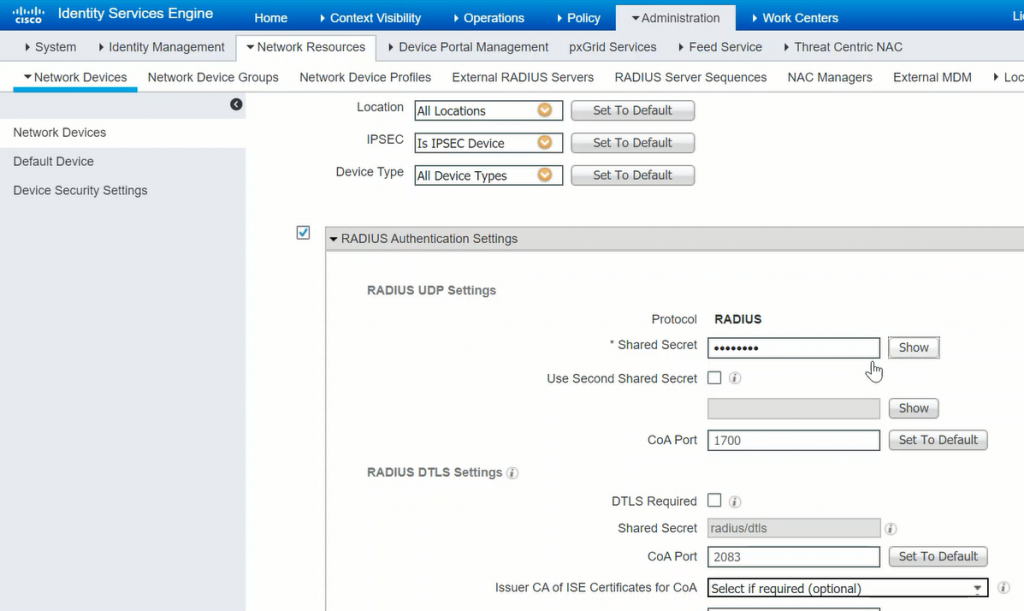
- Add WLC
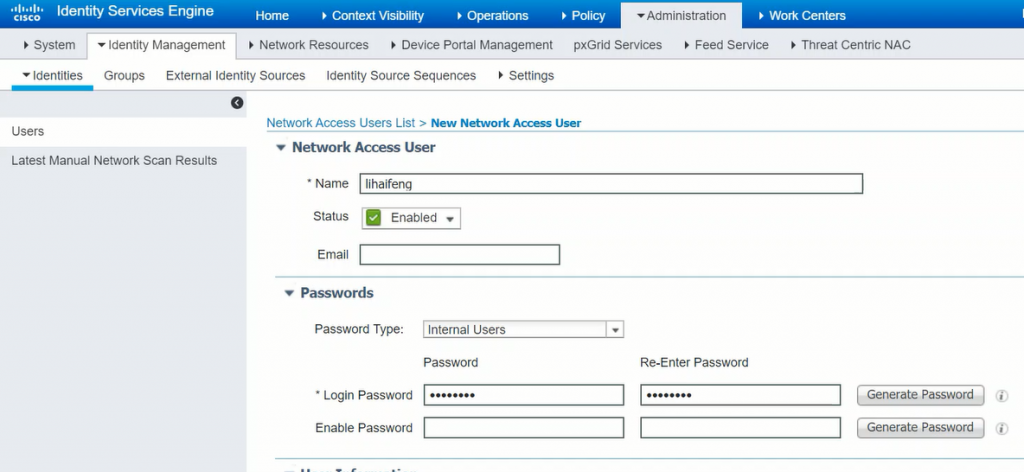
- Add user
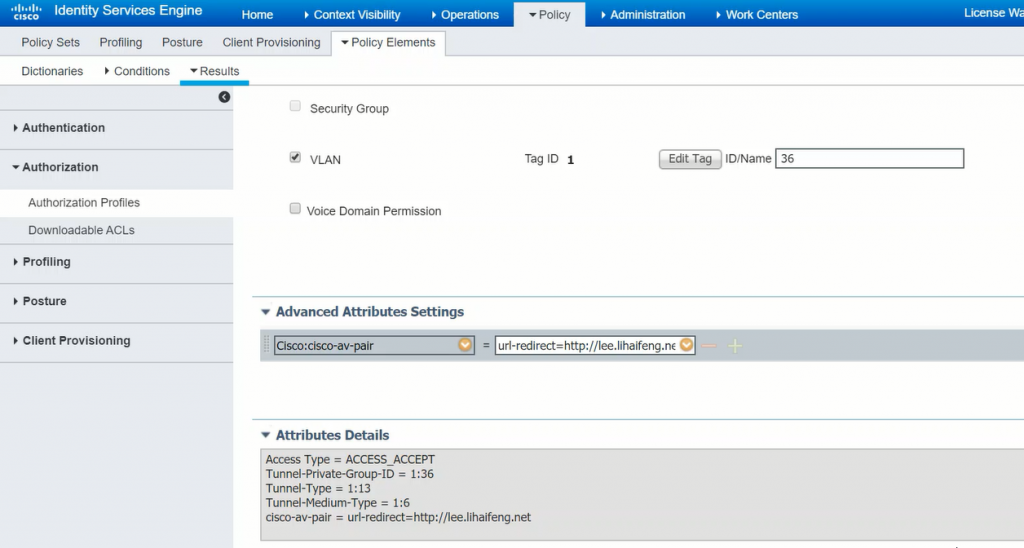
- Add Authorization Policy
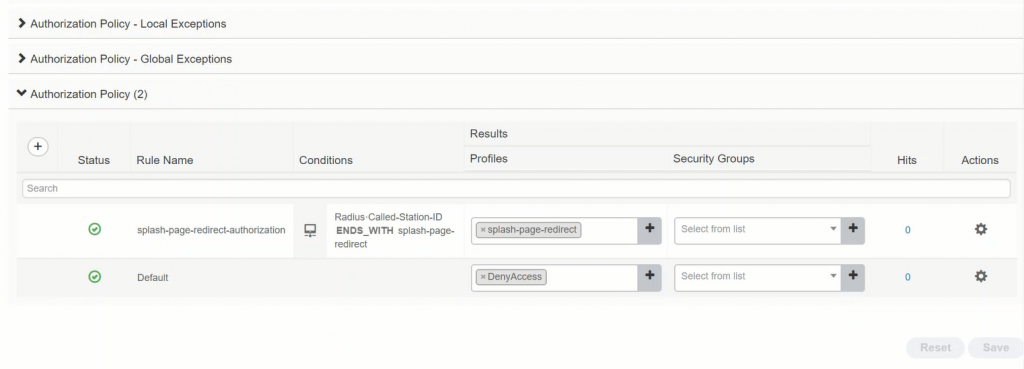
- Add Policy Sets

Verification
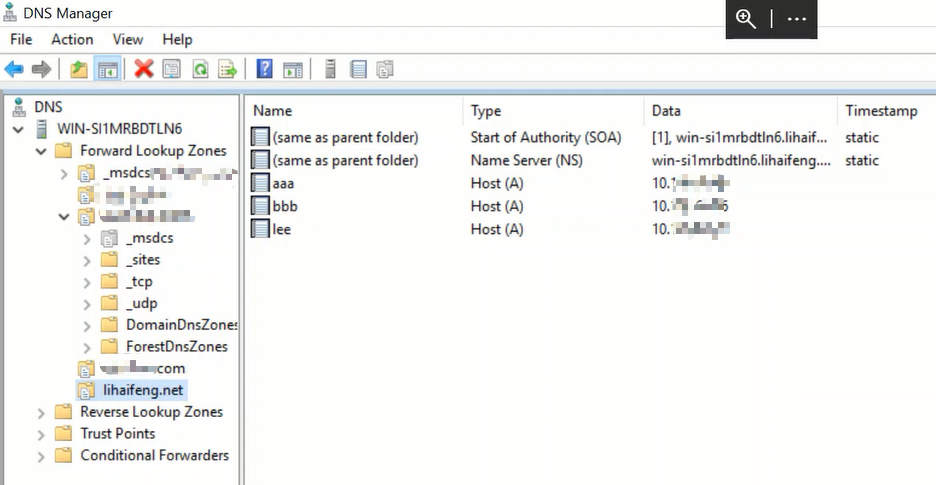
In the DNS server I added some domain names.
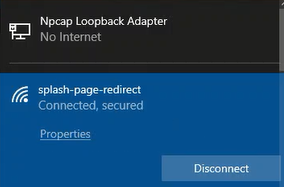
Connect to SSID.
If you type the show client detail command at this time, you can see the following.
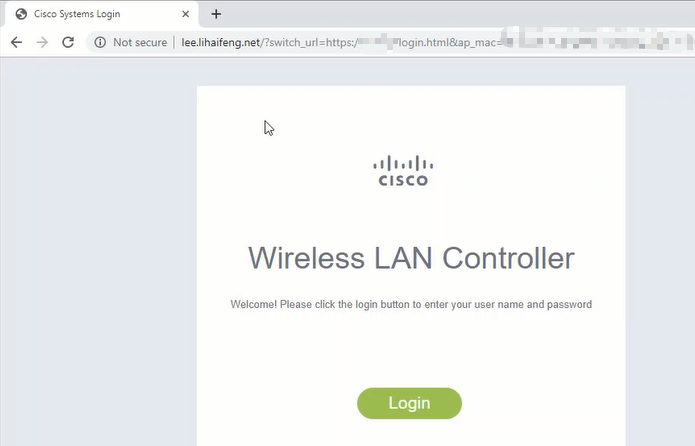
Policy Manager State............................. WEBAUTH_REQD

Pre-auth redirect URL............................ http://lee.lihaifeng.net
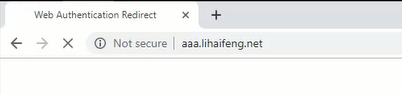
We can try to access a URL, this URL can be any URL. We can see that the browser is redirecting.
Redirected to the URL we set.
Type the show client detail command again, and we can see that the client status is RUN, the client has full access.
Policy Manager State............................. RUN
references
Wireless LAN Controller Splash Page Redirect Configuration Example
Recent Comments